Save yourself from squinting all day
One of the best ways to avoid or reduce eye strain and headaches while using your computer is to have the correct screen brightness.
For many Windows 10 users, using the brightness adjustment keys on their keyboards is a quicker way of manually adjusting the brightness level on their PCs.
Table of Contents

If, for some reason, the keys fail to work as they should, there are other methods you can use to adjust brightness on your Windows 10 PC.
How to Adjust Brightness on Windows 10
You can adjust the levels of brightness on Windows 10 manually or automatically based on surrounding light, battery life, or using a power plan.
How to Manually Adjust Brightness
You can adjust brightness manually from the computer’s display settings, from your keyboard, or using the Windows Mobility Center.
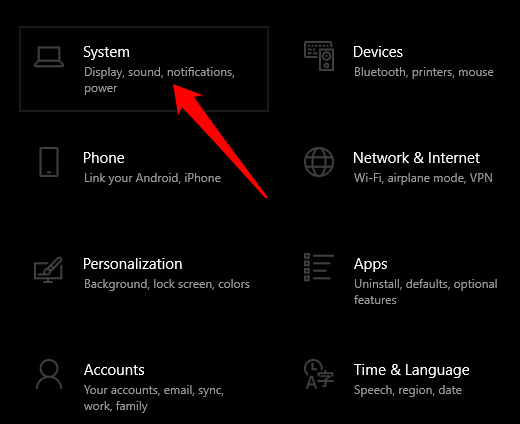
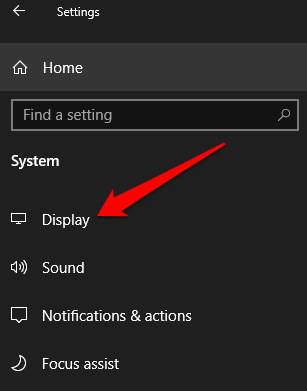
- To adjust brightness using display settings, select Start > Settings > System.
- Next, select Display and go to the Brightness and color section.
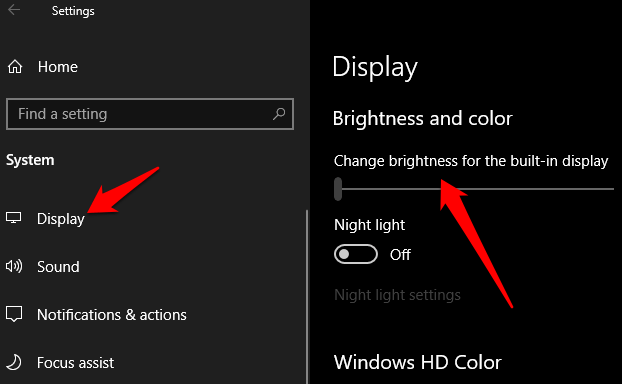
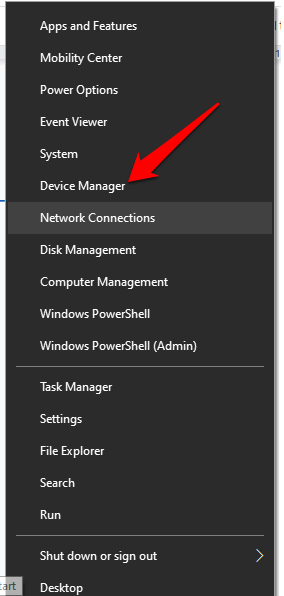
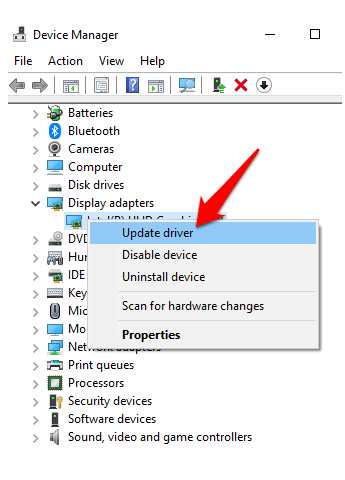
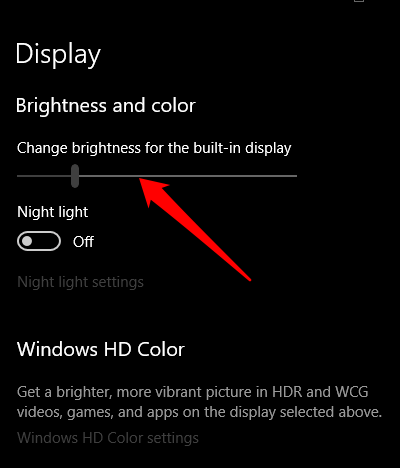
- Using the Change brightness slider, adjust the brightness to your liking. If you don’t see the slider, you may need to update the display driver. To update an outdated driver, right-click Start > Device Manager.
- In the Device Manager window, select and expand the Display adapters category.
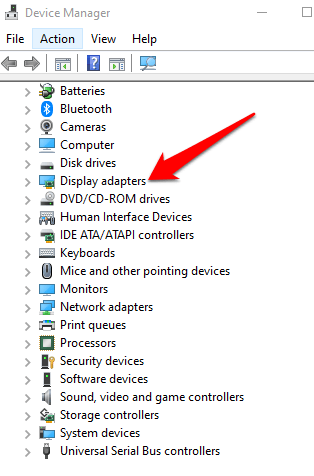
- Right-click your graphics card, select Update driver, and then follow the instructions to complete the process.
- If you’re using a second monitor, change the brightness using the buttons on the monitor.
Your keyboard also has dedicated keys for adjusting brightness. These keys are located next to the function keys or on the top row depending on the make or brand of your computer or keyboard.
For this guide, we used a Lenovo laptop whose brightness adjustment keys are placed on the top row of the keyboard, next to the Print Screen key.

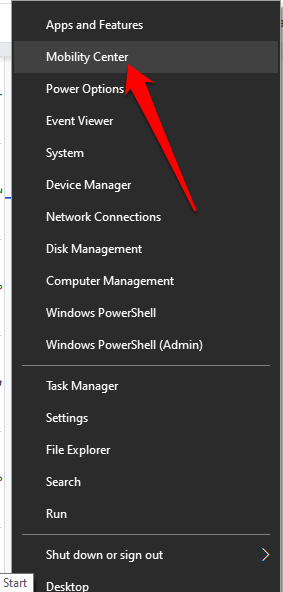
The Windows Mobility Center is an alternative way to manually adjust brightness on Windows 10.
- To access the Windows Mobility Center, right-click Start > Mobility Center.
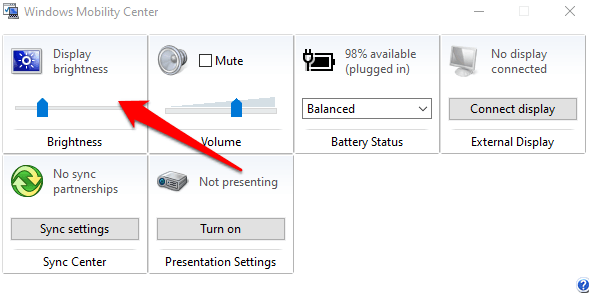
- From the Mobility Center window, use the Display Brightness slider to adjust the brightness to the level that’s comfortable for your eyes.
How to Automatically Adjust Brightness
You can adjust brightness on Windows 10 automatically by enabling the battery saver feature.
- To enable the battery saver feature, select Start > Settings > System.
- Select Battery and then go to Battery Saver Settings.
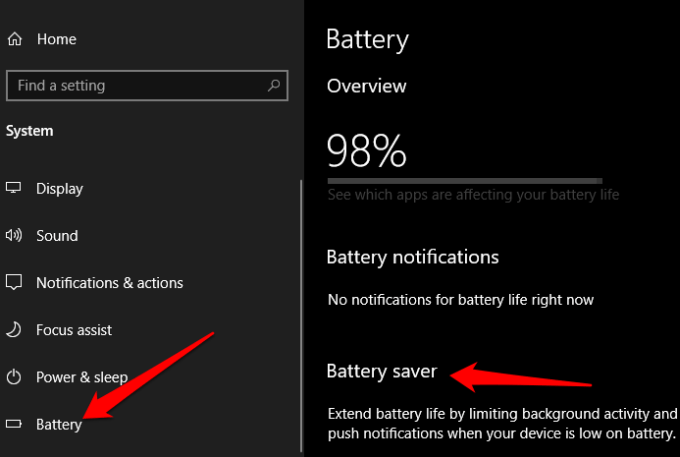
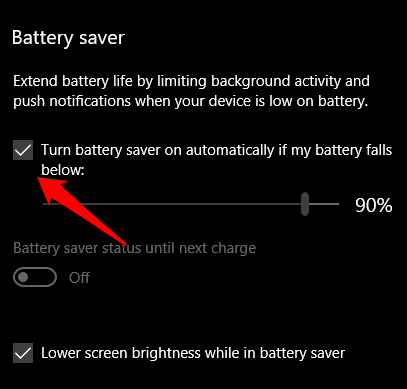
- Next, check the Turn battery saver on automatically if my battery falls below checkbox, and then adjust the percentage battery level using the slider.
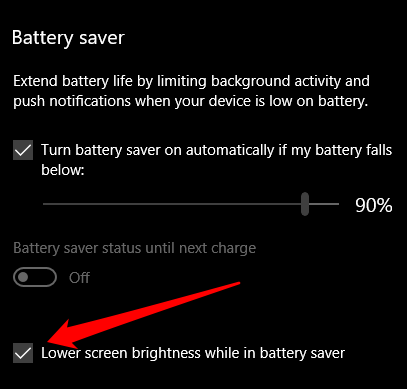
- Check the Lower screen brightness while in battery saver checkbox as well.
How to Use Adaptive Brightness to Adjust Brightness
Adaptive brightness is a Windows 10 feature that automatically adjusts your display to match the lighting conditions of your surroundings. The feature does this by tapping into the ambient light sensors, and is therefore useful in conserving battery life.
- To enable adaptive brightness, select Start > Settings > System and go to Display.
- If your device has a brightness sensor, the Change brightness automatically when lighting changes setting will be available, in which case switch it to On.
How to Adjust Brightness on Windows 10 Using Shortcuts
There are adjustment shortcuts you can use to adjust brightness on Windows 10. One of these shortcuts involve opening the Action Center in the taskbar and adjusting the brightness slider to your preferred level.
- To do this, select the Notification icon on the taskbar and then drag the brightness slider to the level you want.
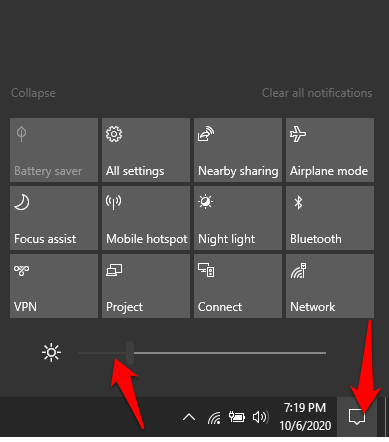
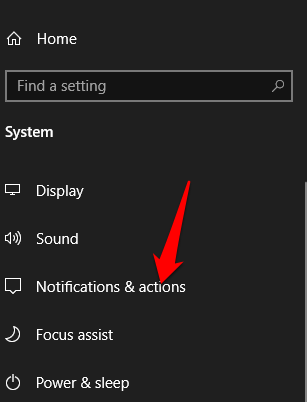
- If the icon isn’t available, select Start > Settings > System > Notifications & Actions.
- Select Edit your quick actions.
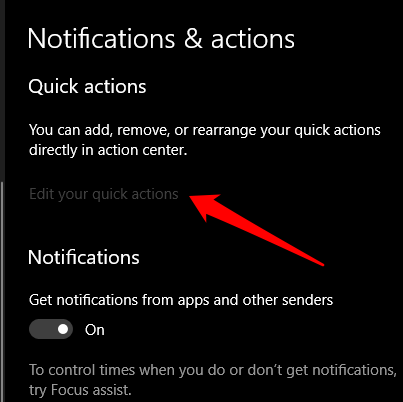
- Next, select Add > Brightness and then select Done.
Use Dark Theme
If you find it uncomfortable spending hours in front of your computer because of screen brightness, you can enable the Windows 10 Dark Theme or use Night Light Mode.
Windows 10 Dark Theme is like dark mode and it helps reduce eye strain due to prolonged computer use. You can use the dark theme to display darker tones by customizing your computer’s color scheme, thus making it easier on your eyes.
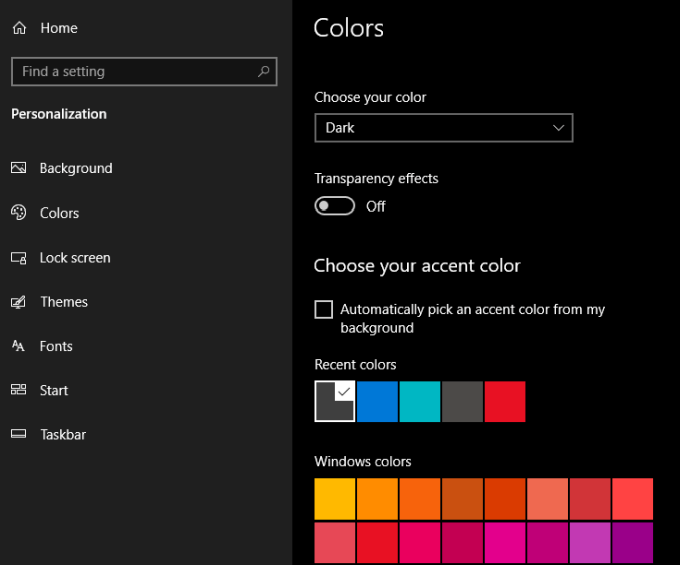
The dark theme will be applied automatically to apps like Mail, Microsoft Store, Calculator, and settings menus, but you may not get it with all aspects of Windows 10. For non-Microsoft apps, you’ll have to enable dark mode in those apps.
Check out our guides on how to enable dark mode on YouTube, Google apps, or macOS dark mode.
Use Windows 10 Night Light Mode
Night Light is a Windows tool that applies a blue light filter to the display. The tool doesn’t change the brightness of your display, but provides a light-theme display, which also reduces eye strain.
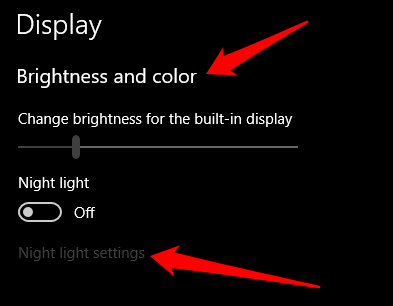
- To activate Night Light Mode on Windows 10, select Start > Settings > Display.
- In the Brightness and color section, select Night light settings.
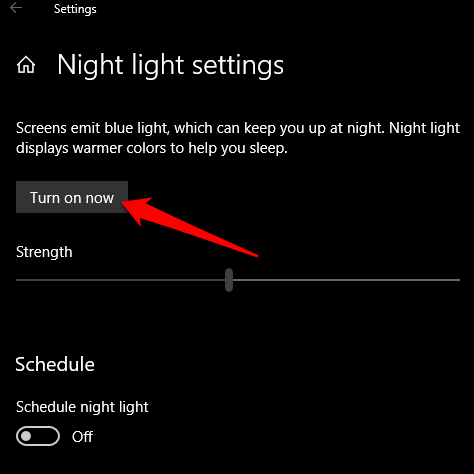
Note: Devices that use Basic Display or DisplayLink drivers lack Night Light mode. Plus, the feature may not apply to all monitors where you have two or more monitors attached to your computer.
- Select Turn on now to enable Night Light immediately.
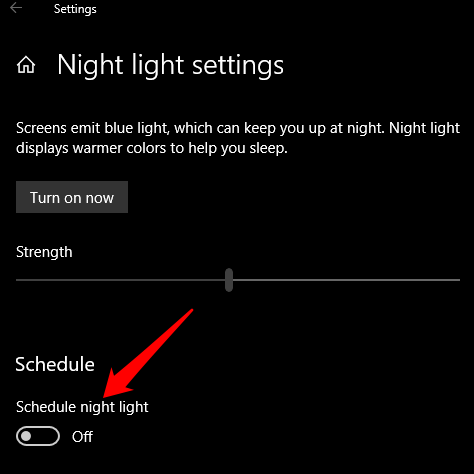
- You can also toggle Schedule Night Light to On. This allows you to schedule Night Light to be displayed automatically during a certain time of the day.
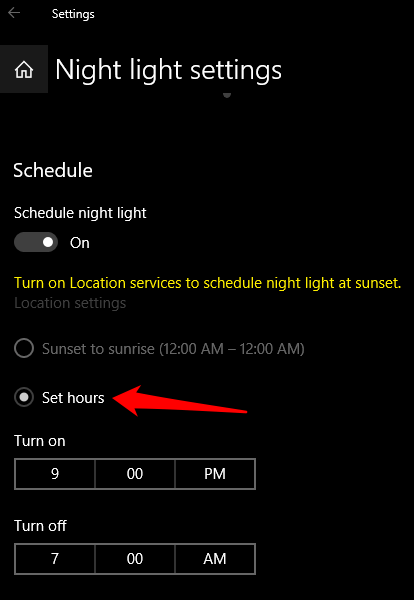
You’ll get two options when you schedule Night Light: Sunset to sunrise, which activates night light to automatically fade in and out from sunset to sunrise. This setting depends on your time zone.
Alternatively, select Set hours to set your custom Night Light intervals at your preferred hours. You can also use the Color temperature at night slider to specify the display range of your light.
Control Your Brightness Settings
We hope you’ve learned how to adjust brightness on Windows 10 to optimize your display for eye health and comfort.
Do you have additional ways to adjust brightness on Windows 10? Share with us in a comment below.
Subscribe on YouTube!
Did you enjoy this tip? If so, check out our YouTube channel from our sister site Online Tech Tips. We cover Windows, Mac, software and apps, and have a bunch of troubleshooting tips and how-to videos. Click the button below to subscribe!
Subscribe