Service Host: Network Service is an essential system process that helps your computer maintain a secure, stable connection to the internet. The problem is that the process often uses a stack of system resources, causing your PC or network to slow down significantly.
Below, we’ll explain what Service Host: Network Service is; then we’ll cover the five best ways to reduce its CPU usage.
What Is Service Host: Network Service?
Service Host: Network Service, also known as svchost.exe, is a host process on the Windows operating system. It hosts various Windows services related to network connectivity, ensuring your computer maintains a stable internet connection.
Some examples of services that Service Host: Network Service manages include Windows Firewall, Windows List Service, and Network Location Awareness. It’s also involved in maintaining network security and optimizing resource allocation.
Is Service Host: Network Service a Virus?
It’s unlikely that your Service Host: Network Service process is malware. However, it is possible since malicious coders like to use the name of Windows processes to remain hidden. And it might explain why your process has suddenly started causing high Network, CPU, or disk usage.
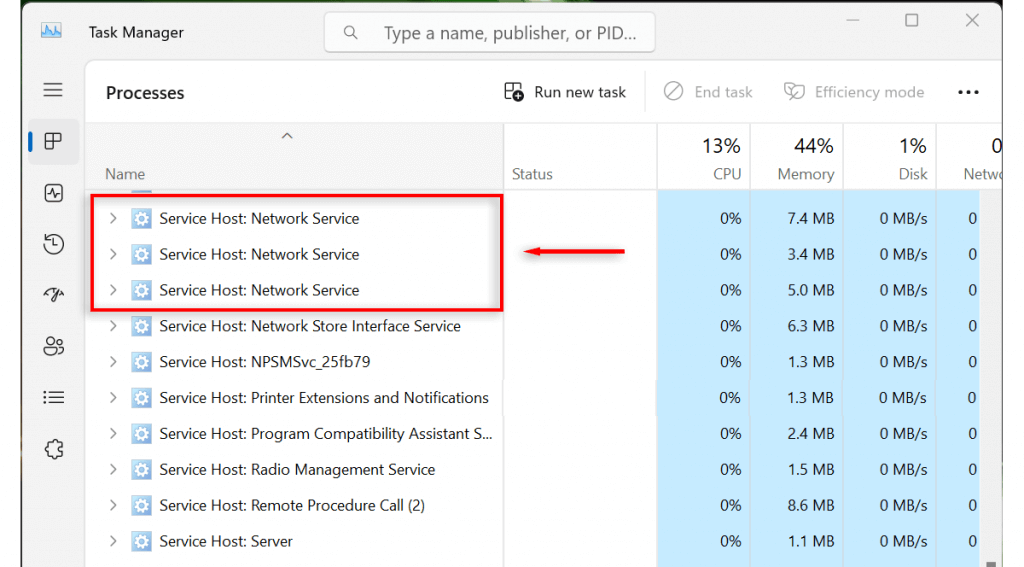
Here’s how to check whether your process is a virus or malware:
- Press Ctrl + Shift + Esc to open the Task Manager.
- Locate Service Host: Network Service, right-click the process and select Properties.
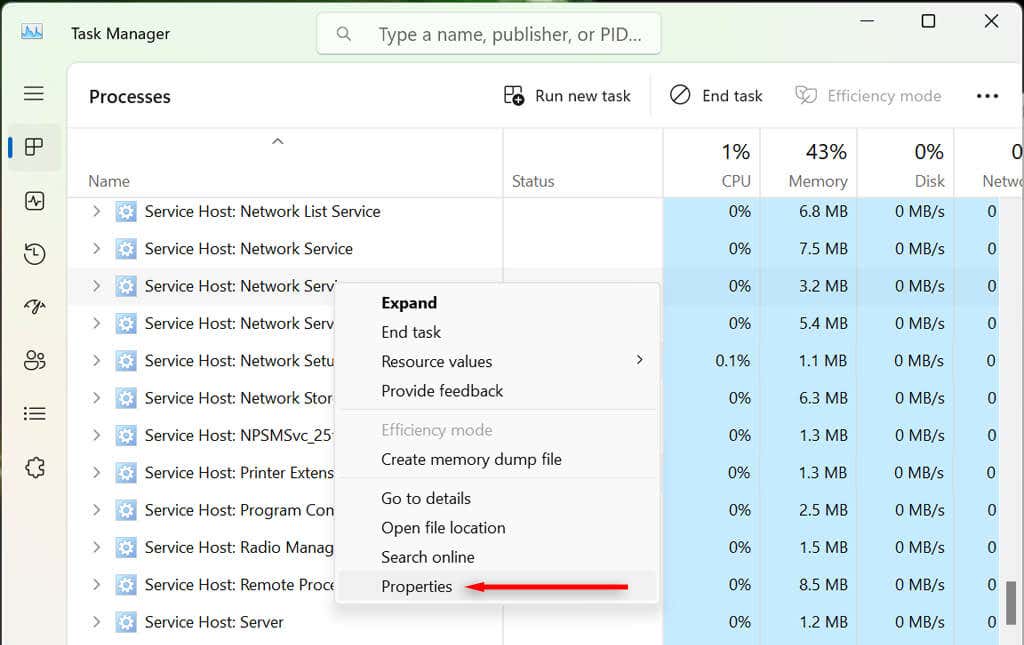
- Check the system file location. If it’s located at C:\Windows\System32, it’s legitimate. To double-check, select the Details tab and make sure the Copyright is under Microsoft Corporation.
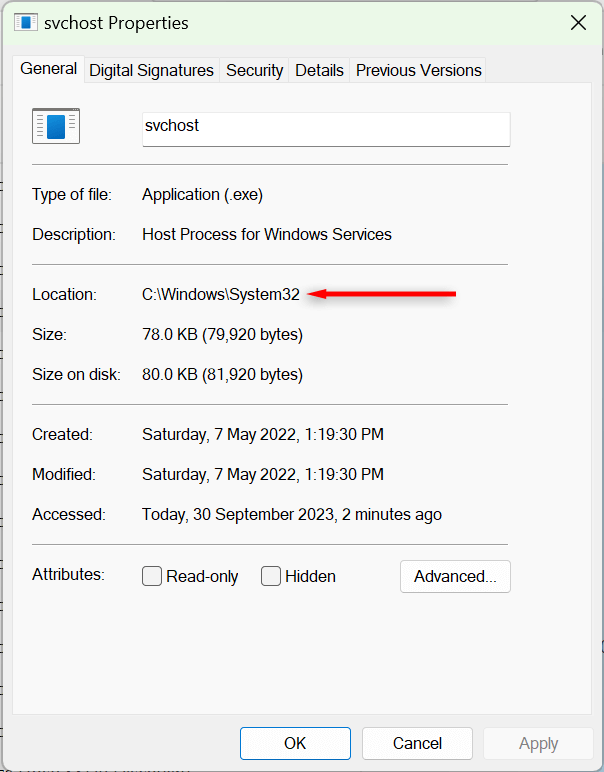
If the executable file is located elsewhere on your PC, it might be a virus. We recommend running an antivirus scan to clear your computer of any potential viruses.
Note: It’s also possible for stubborn malware to take advantage of system processes like svchost.exe, masking their activity and making it seem like the system process is responsible for high network or memory usage. We recommend installing reputable antivirus software and running a deep scan, just in case your device is infected.
How to Fix Service Host: Network Service High Network or CPU Usage
Usually, if the svchost.exe process is causing high network or CPU usage, something went wrong. A properly functioning system process should not use up that many system resources. Luckily, there are a few easy fixes that should solve your problem.
1. Check for Windows Updates (and Run Windows Update Troubleshooter)
Updating Windows can clear out any residual glitches in its system processes. To update Windows:
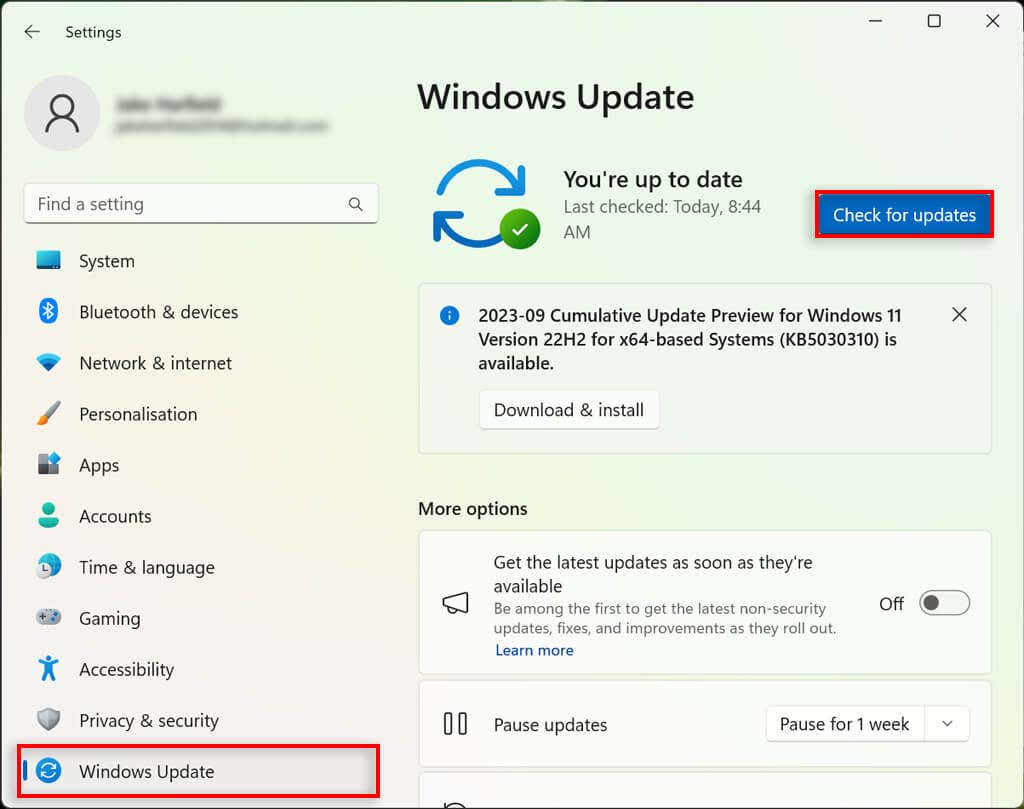
- Press the Windows key + I to open Settings.
- Select Windows Update (on Windows 10, this is Update & security).
- Select Check for updates.
- Wait for the updates to download and install, then reboot your computer.
Problems can also occur when a Windows update freezes and cannot be completed. In these cases, Windows Update might cause svchost.exe’s high network usage. To fix problems with Windows Update, you should run the Windows Update Troubleshooter. On Windows 10:
- Open Settings.
- Select Update & Security.
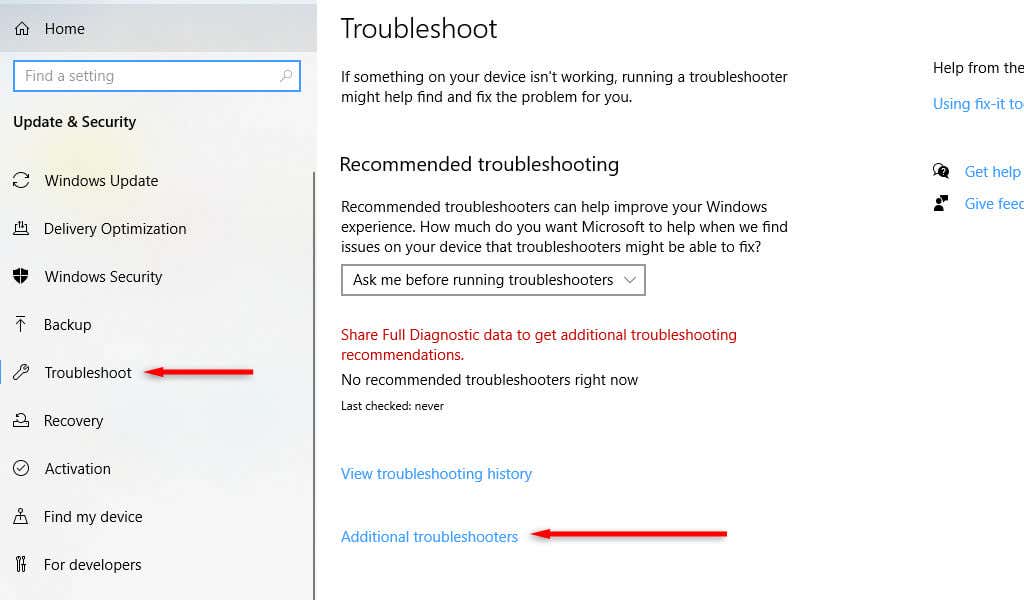
- Choose Troubleshoot from the left-hand menu.
- Select Additional troubleshooters.
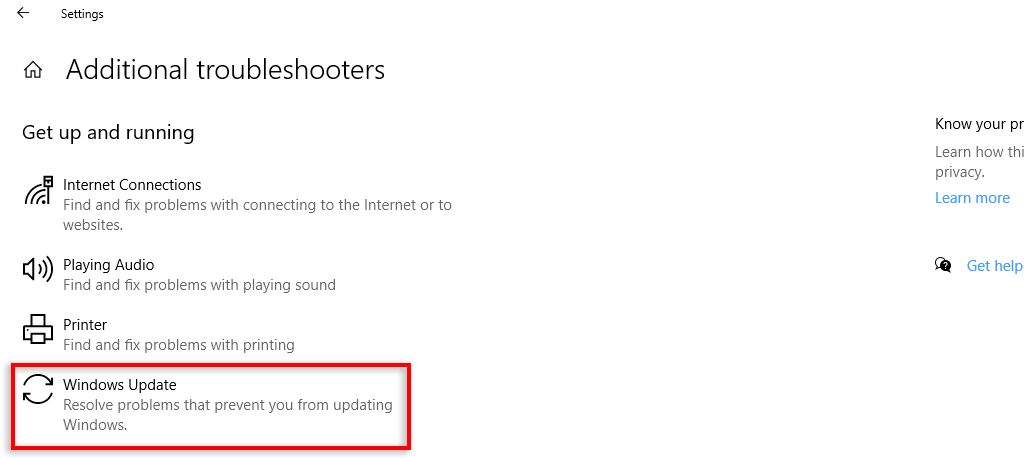
- Select Windows Update, then choose Detect problems and apply the fixes.
- Wait for the troubleshooter to complete, then reboot your system.
On Windows 11:
- Open Settings.
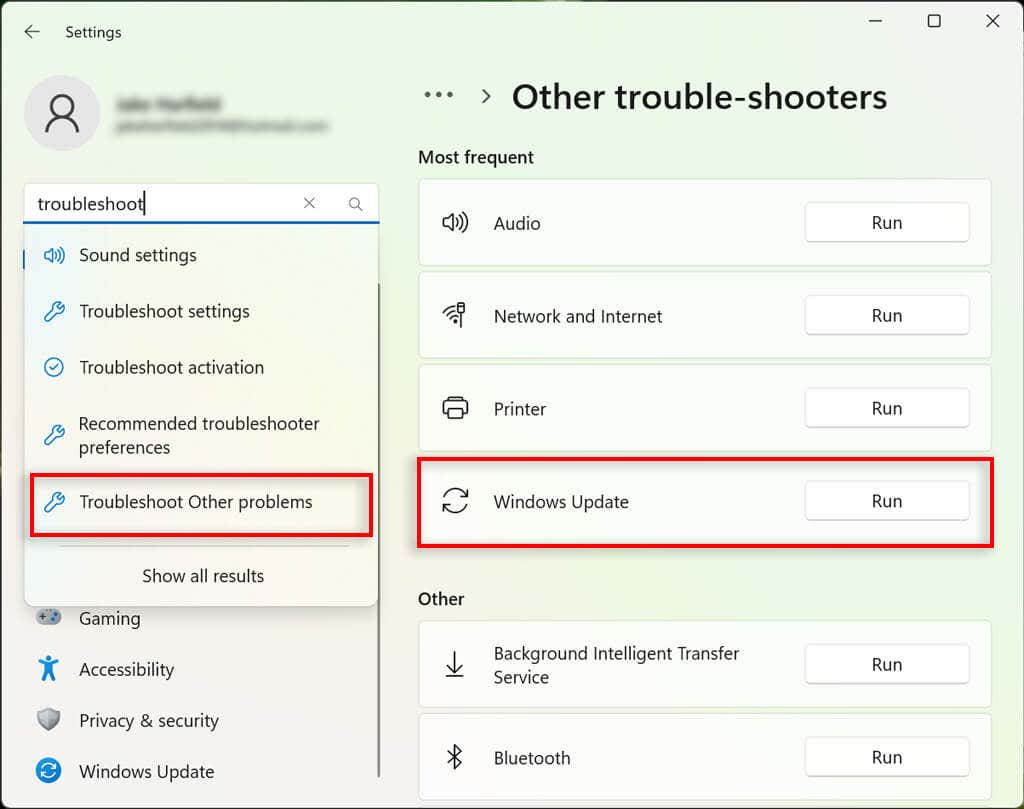
- In the search bar, type “Troubleshoot.”
- Select Troubleshoot other problems.
- Next to Windows Update, press Run. Complete the instructions on-screen.
2. End the Task and Reboot Your PC
A second quick fix that works for some users is simply ending the task and restarting your computer. This seems to refresh the system process, clearing out whatever bug caused it to malfunction. To do so:
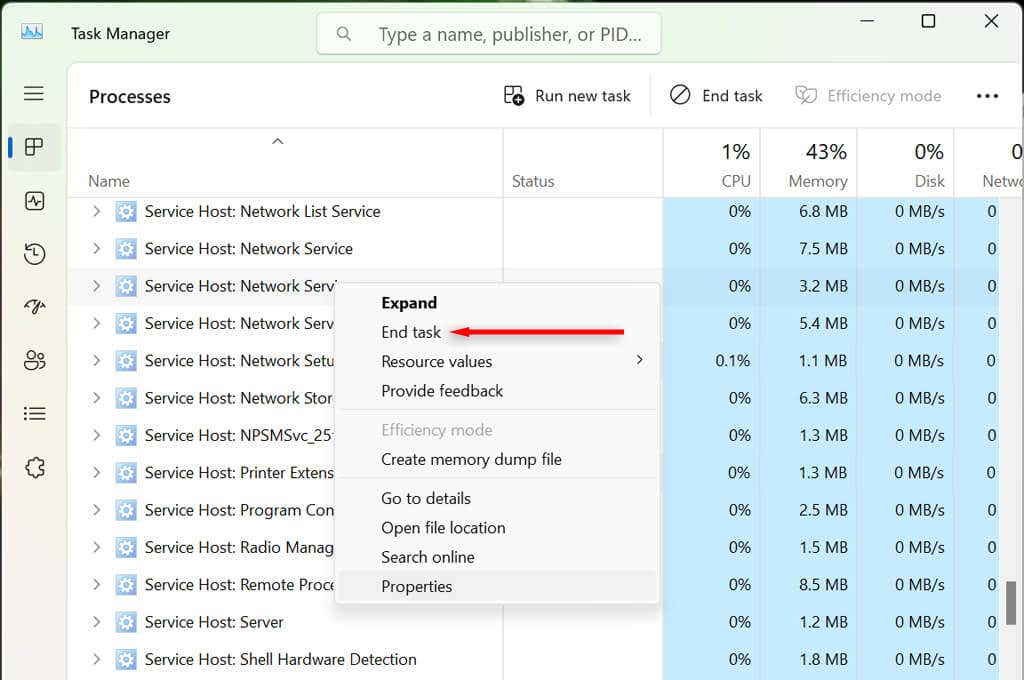
- Open Task Manager.
- Right-click Service Host: Network Service and select End Task.
- Open the Start Menu then select Restart.
- Wait for your PC to reboot, then check whether the CPU usage has decreased.
3. Disable Faulty Services
There are several services that, when disabled, seem to resolve the high CPU usage of Service Host: Network Service. We recommend disabling these individually to find out whether any are at fault. If disabling them has no effect on your system resource usage, re-enable them to ensure that your computer runs as it should.
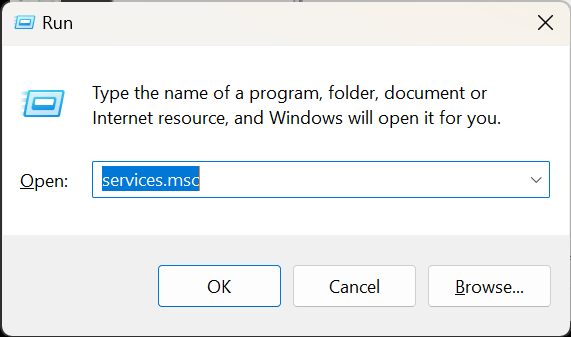
- Press the Windows key + R to open the Run dialog box.
- Type “services.msc,” then press Enter.
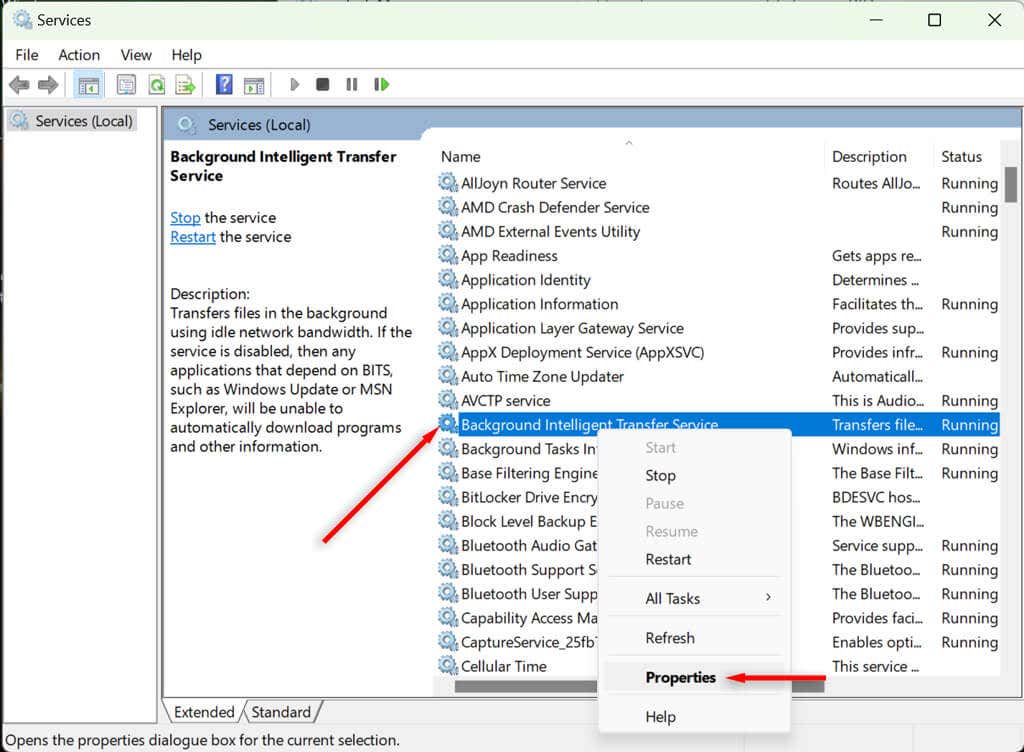
- First, locate Background Intelligent Transfer Service. Right-click it, then select Properties.
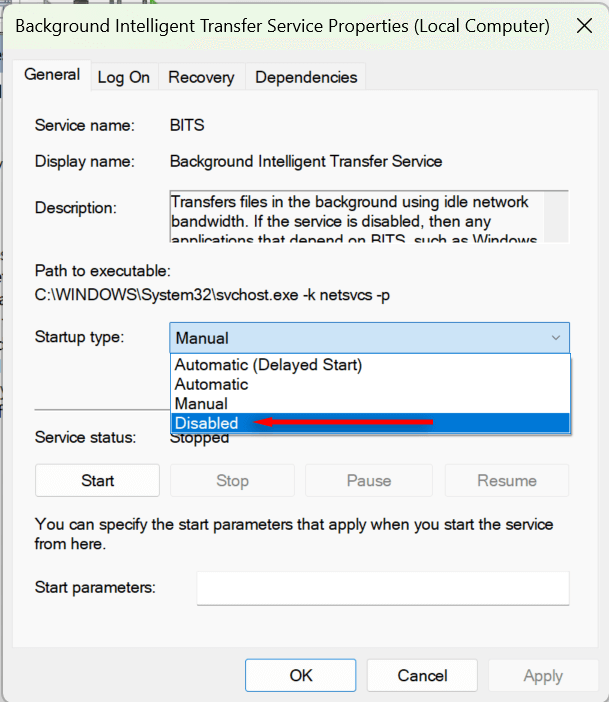
- Under the Startup type drop-down menu, select Disabled.
- Reboot your system and check your network usage.
- If your bandwidth usage is still high, repeat the above process for Wuauserv (or Windows Update Service).
- If disabling the Windows Update Service doesn’t work, the final thing to try is to disable Superfetch. Follow the steps above to disable Superfetch, then reboot your PC and check your network usage.
If neither works, try disabling Delivery Optimization. To do so on Windows 10:
- Open Settings.
- Select Updates & Security > Delivery Optimization.
- Toggle off Allow downloads from other PCs.
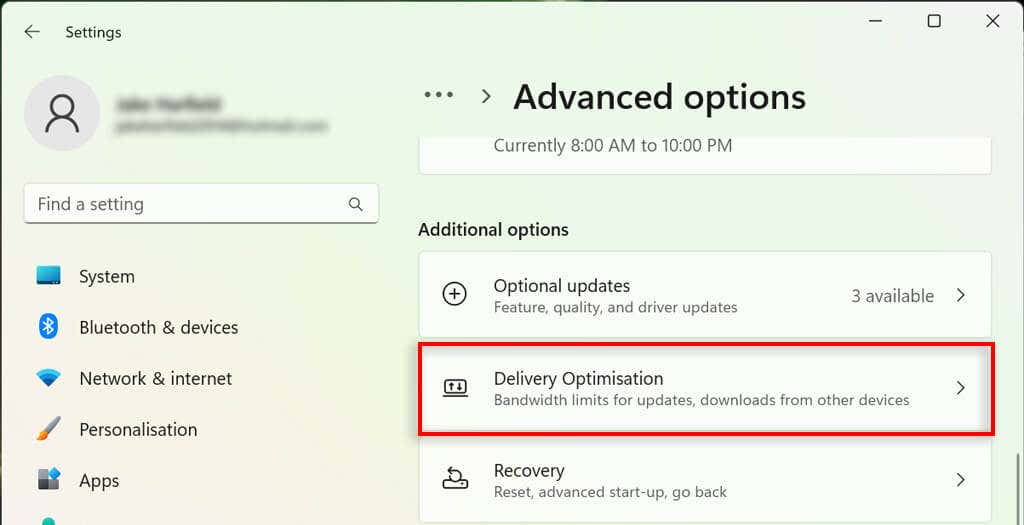
To disable Delivery Optimization on Windows 11:
- Open Settings.
- Select Windows Update.
- Choose Advanced Options > Delivery Optimization.
- Toggle off Allow downloads from other PCs.
4. Check For Third-Party Downloads
Often, when Service Host: Network Service is causing extremely high network bandwidth usage, it’s because of an application like the Xbox app or Steam downloading (or failing to download) in the background.
To find out whether or not this is the case for you, check each app you know of that might be downloading something in the background. The most common culprits are the Xbox app, Steam, and the Microsoft Store.
5. Use the Repair System File Checker
Your final resort is to run an SFC scan. This will check your PC for any corrupted system files, replacing them with fully functional files. To run an SFC scan:
- Open the Start Menu and search for Command Prompt.
- Right-click Command Prompt and select Run as administrator.

- In the Command Prompt window, type sfc /scannow and press Enter.
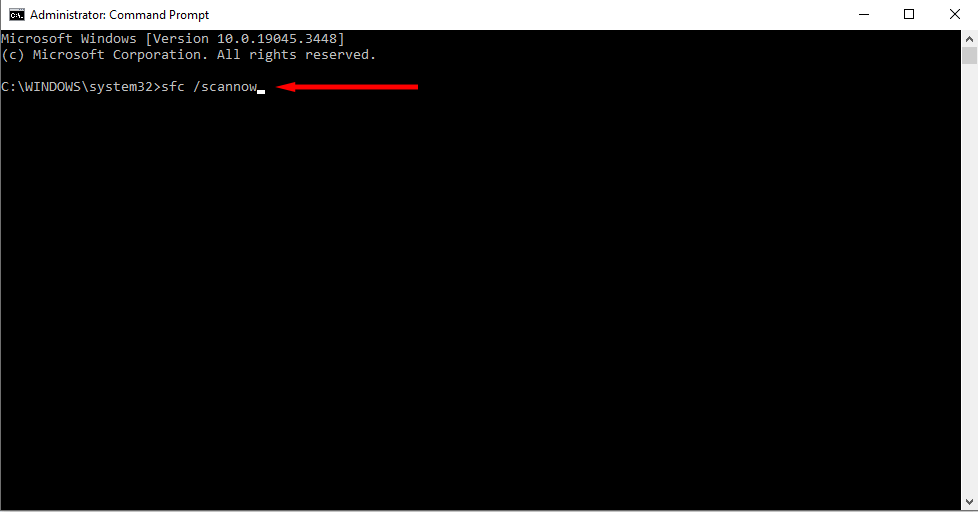
- Wait for the process to complete, then check whether your network usage has reduced.
Service Host: Problem Solved
The Service Host: Network Service process is an essential system file and can’t be removed. But hopefully, with the help of this article, you’ve fixed its high resource usage and your computer is now running as it should.