One of these is sure to do the trick
Outlook provides some really great features to make your emailing experience easier and faster. However, many users come across a variety of issues while using Outlook. One of these issues is Outlook not being able to access your personal data file.
The exact error message should look something like the following:
Table of Contents
0x8004010F: Outlook data file cannot be accessed.
When this error occurs, you can’t send or receive emails and Outlook keeps displaying the above error on your screen. This error is usually the result of a corrupted Outlook profile. There are multiple ways to fix this issue and get Outlook to recognize the data files.
Create & Use a New Outlook Profile
The easiest way to fix the “Outlook data file cannot be found” error is to create a new profile and use it as the primary profile in Outlook. This will get rid of any issues with the old profile’s configuration and let you start fresh.
Find The Data File Location
You need to first find the location of your Outlook data file.
- Open Control Panel on your Windows computer.
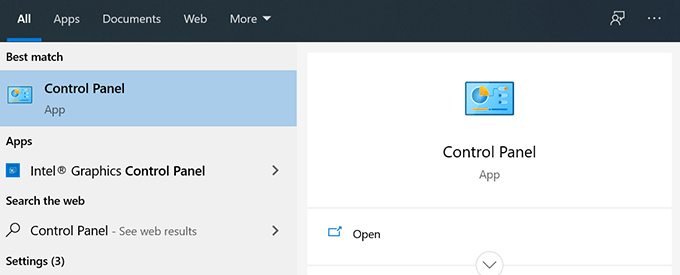
- Click the View by menu at the top-right corner and ensure the Large icons option is selected.
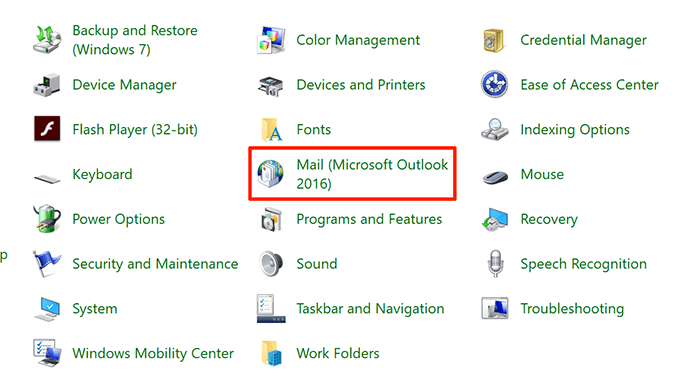
- Find and click the Mail option to view your email settings.
- Click the Show Profiles button to view your Outlook profiles.
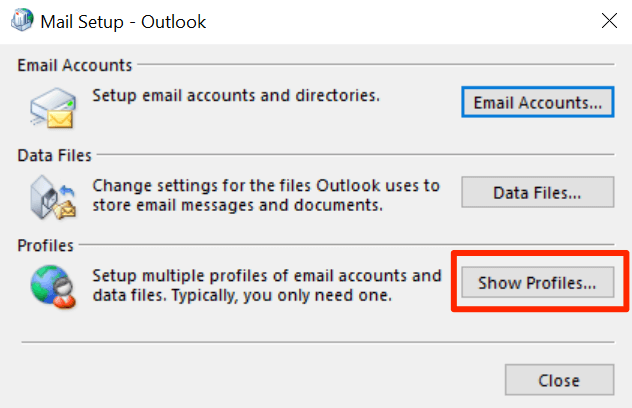
- Choose your current profile from the list and click Properties.
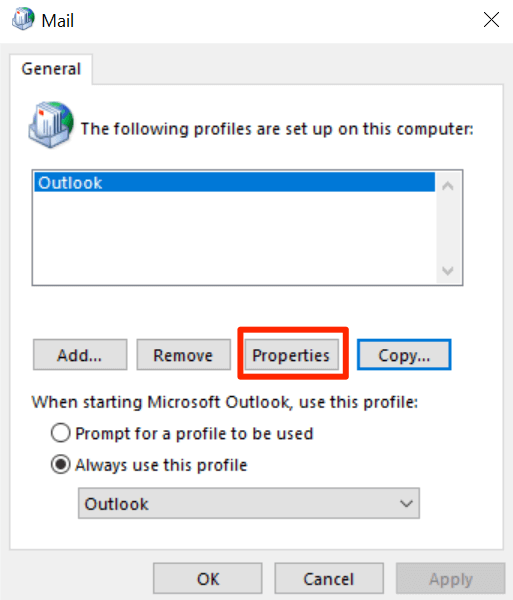
- Select the Data Files button to see where your data file is saved.
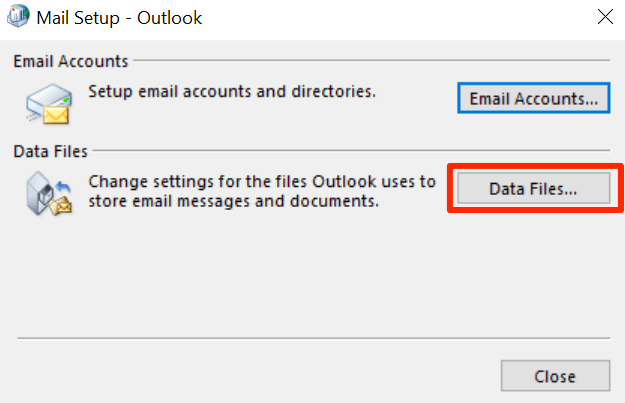
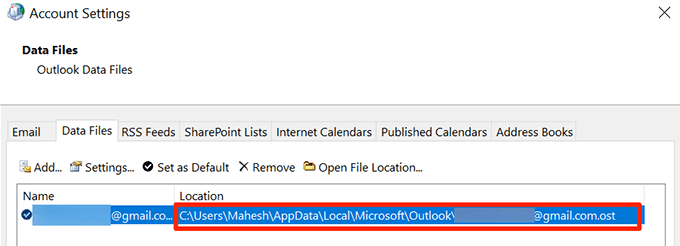
- The following screen will have a file entry with a checkmark icon next to it. Note the location of this Outlook data file.
Create a New Outlook Profile
You can now create a new Outlook profile to replace your old and corrupted one. Keep your email logins handy as you’ll need them to set up your email account.
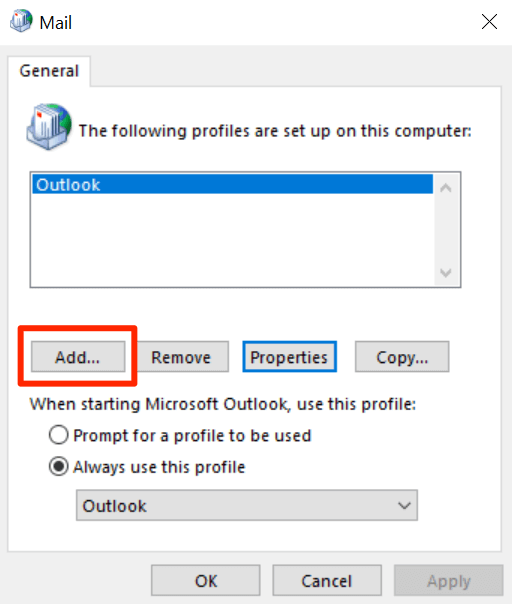
- Open Control Panel and click the Mail option.
- Select the Show Profiles button to view your profiles.
- Click Add on the following screen to add a new profile.
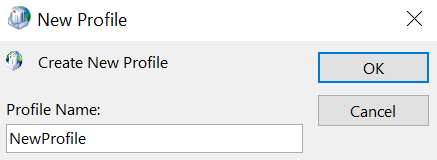
- Enter a name for your new profile in the Profile Name field and click OK to save the profile.
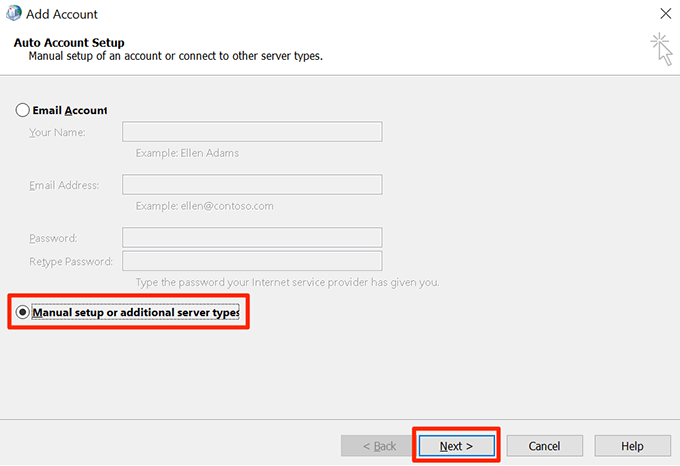
- The email setup wizard will now appear. Select the Manual setup or additional server types option and click Next to start setting up your email account with Outlook.
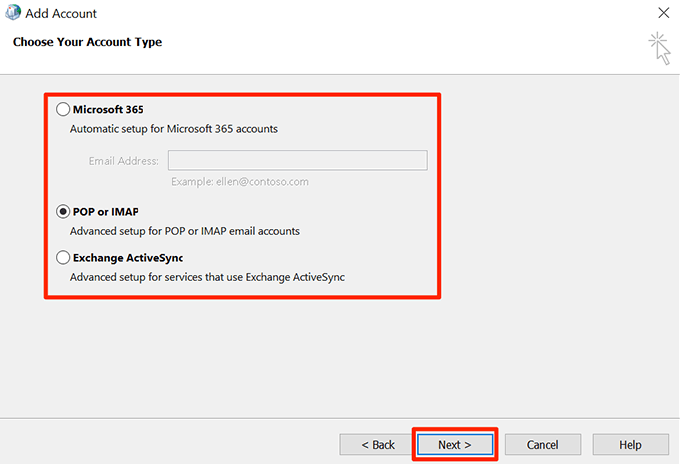
- Select your email account type and click Next at the bottom. If you have POP3 or IMAP details for your email account, select that option and you can then manually configure the account settings.
- Fill-in the email account information on the following screen. When you’re done, select Existing Outlook Data File from the Deliver new messages to section and then click the Browse button.
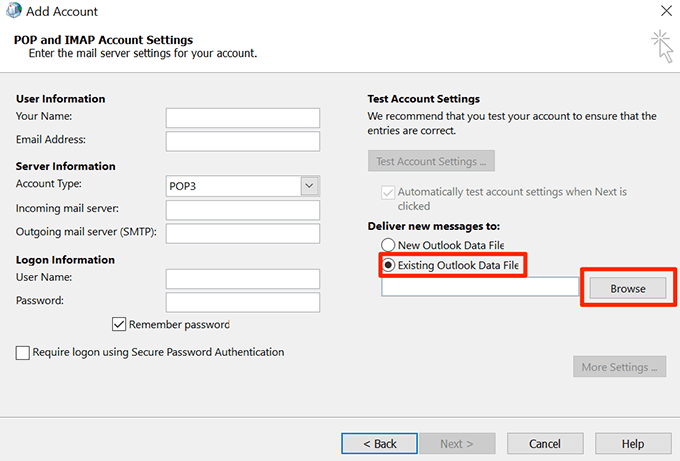
- Head to the Outlook data file’s path you noted earlier and select that file.
- Finish the email account setup wizard.
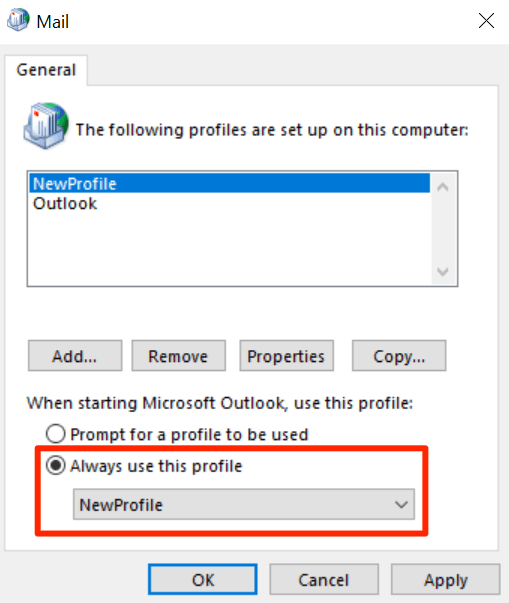
- Go back to the Mail box, choose your newly created profile from the Always use this profile menu, and click OK. This will make your new profile the default email profile for Outlook.
Change The Mail Delivery Location
Another solution is to add a new data file and set Outlook to use it to store your emails. This will create a fresh data file for Outlook and will usually fix the “Outlook data file cannot be opened” error.
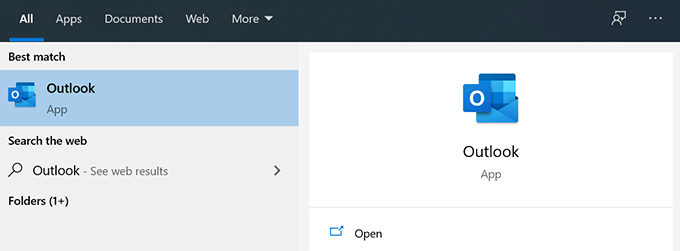
- Open the Start Menu and launch Outlook.
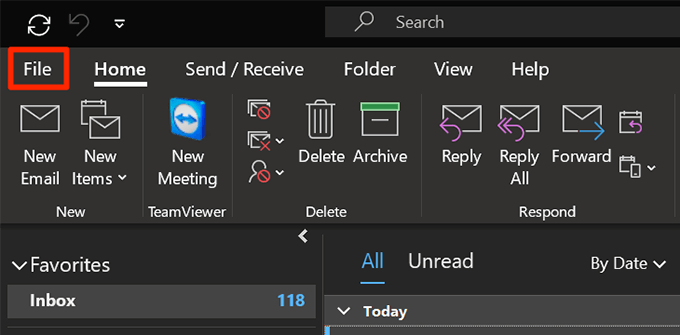
- Click the File tab at the top of your screen.
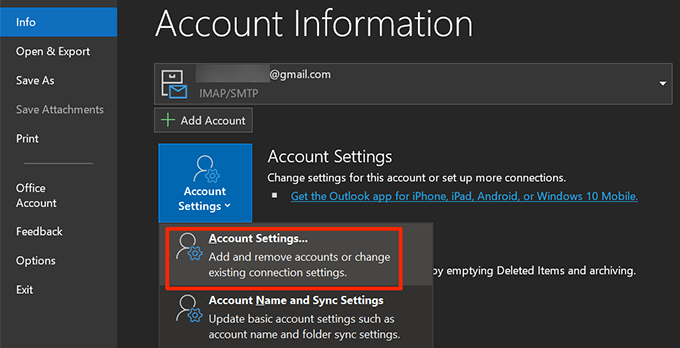
- Select Info from the options in the left sidebar. Then click Account Settings on the right-hand side pane and select Account Settings again.
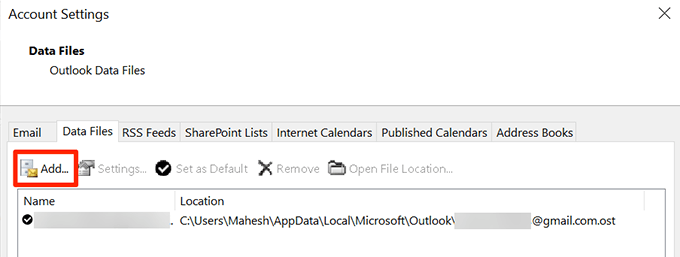
- By default, you’ll be in the Email tab. Switch to the Data Files tab and click the Add button to add a new data file.
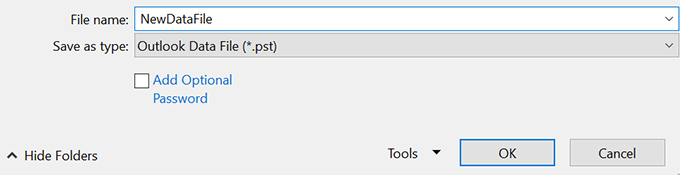
- Outlook will ask where you’d like to save the file. Choose a location, enter a name for the file, and click OK to save the file.
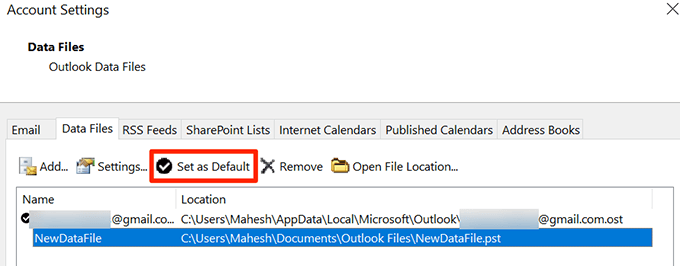
- Outlook will still use your old data file to save your messages. Change that by setting your new data file as the default data file. Select your newly created file in the list and click Set as Default at the top.
Gain Ownership Of Your Outlook Data File
Issues due to incorrect file permissions are common on Windows machines. In this case, your Outlook issue could be due to an incorrect data file ownership permission setting.
You can fix this permissions issue by changing the ownership permission back to your user account.
- Launch File Explorer and head to your Outlook data file’s directory. Use the first section in this guide to find where Outlook saves the data files.
- Right-click your Outlook data file and select Properties.
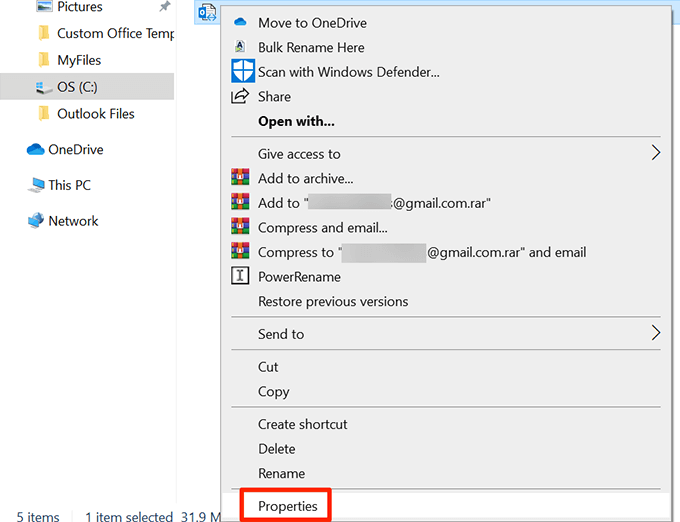
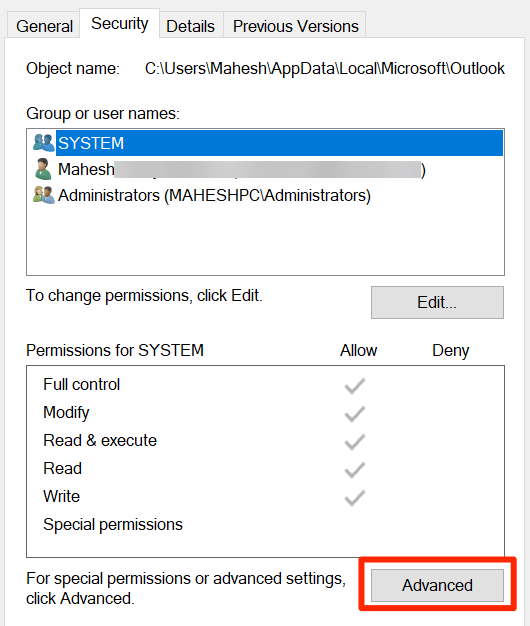
- Click the Security tab and then choose Advanced.
- Click Change next to where it says Owner to change the owner of your selected file.

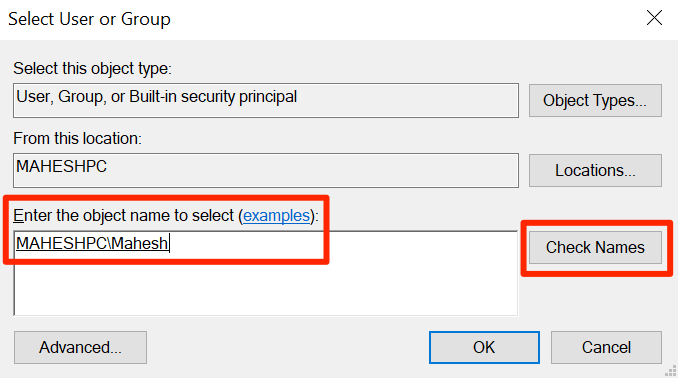
- Put your cursor in the Enter the object name to select box, type your computer username, and click Check Names. Then click OK.
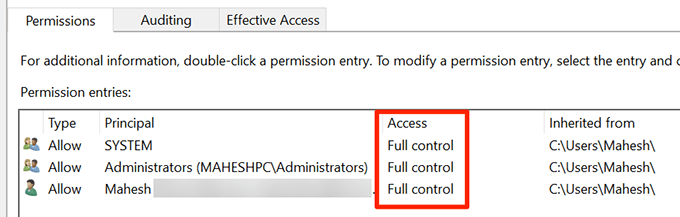
- Ensure the Access column says Full control next to your username. Then click OK.
Repair Outlook Using The Repair Tool
If your Outlook still displays the error that it can’t access the data file, your last resort is to use the Microsoft repair tool. This tool comes preloaded with your Office installation and you can use it to fix issues with all your Office apps including Outlook.
- Open the Settings app.
- Select Apps on the following screen.

- Scroll down the apps list until you find Microsoft 365 or Microsoft Office.
- Click the Office entry and select Modify.

- Choose Yes if Windows asks you for some permissions.
- The repair tool will ask how you want to repair Outlook and other Office apps. Choose Quick Repair and see if it fixes the problem. If it doesn’t, select the Online Repair option for a thorough repair of your apps.

Data files are crucial for Outlook to send and receive emails. Outlook may display various errors if these files are corrupted or unavailable. The above methods will fix the data file access error. There are methods to fix a slow-running Outlook as well as fixing autocomplete issues in Outlook.
Subscribe on YouTube!
Did you enjoy this tip? If so, check out our YouTube channel from our sister site Online Tech Tips. We cover Windows, Mac, software and apps, and have a bunch of troubleshooting tips and how-to videos. Click the button below to subscribe!
Subscribe