Automate anything inside a command prompt
Do you find yourself opening the same programs every time you start your computer? Are you always opening the command prompt to run the same commands all the time? Learning how to make a BAT file can save you a lot of time by automating those actions.
A BAT file is a special text file format with a .bat extension that runs a series of Command Prompt commands in a sequence that you specify. You can make a BAT file that automates anything you might do inside a command prompt.
Table of Contents
What can you do with a BAT file?
- Modify system settings
- Automate launching websites
- Start multiple apps on a schedule
- Automate system backups
In this guide you’ll learn how to create and run your first batch file on Windows 10. You’ll also learn how to do some advanced automation with a BAT file and how to schedule those automations using the Task Scheduler.
Make A BAT File In Three Steps
Creating a BAT file in Windows 10 is very simple. All you need is Notepad. You just need to create a text based file with the BAT commands formatted correctly. Then save the file with a .bat extension and then run it.
However, there are a few important considerations to keep in mind along the way so let’s work through the steps.
In this section, you’ll learn how to create an automated BAT file that launches Chrome to your favorite News web page, clears your Windows 10 cache to boost system performance, and pulls the latest weather forecast from the web.
Step 1: Create A Simple Startup Batch File
To make a BAT file in Windows 10, just select the Start menu, type Notepad, and select the Notepad app to open it. Inside of Notepad, you’ll need to type the following script. You can copy and paste from there into Notepad.
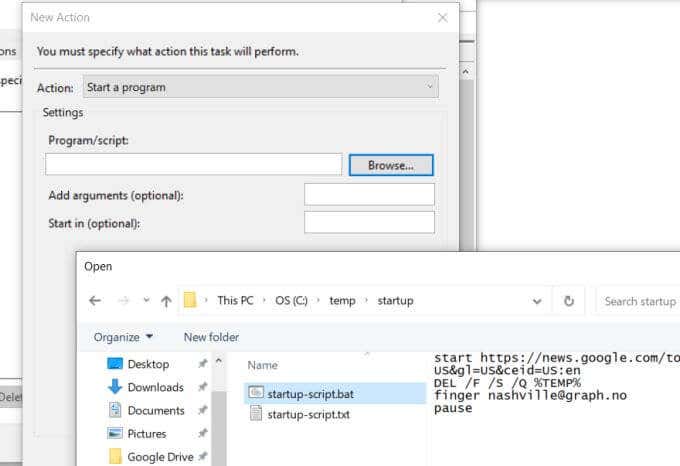
start https://news.google.com
DEL /F /S /Q %TEMP%
finger nashville@graph.no
pause
Save the file somewhere on your PC that is easy to find. Many people save their BAT files in C:\temp or some simple folder located at the root C: drive level.
It’s important to change the Save as type drop-down to All files. Then, make sure to add “.bat” at the end of the file name.
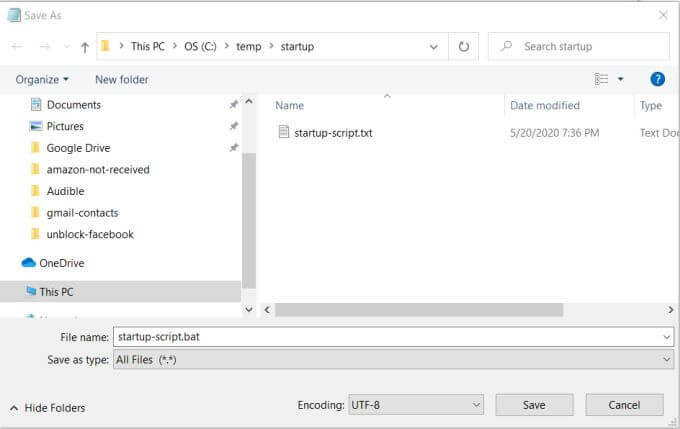
This will save the text-formatted file as batch file format.
Now, open that director in Windows Explorer and double click on the new BAT file you just created. When you do this, you’ll see the following actions occur in sequence.
- The Google News web page will open using your system’s default browser.
- All files in the Windows temporary folder will be deleted.
- The command prompt will display the weather forecast for the next 24 hours.
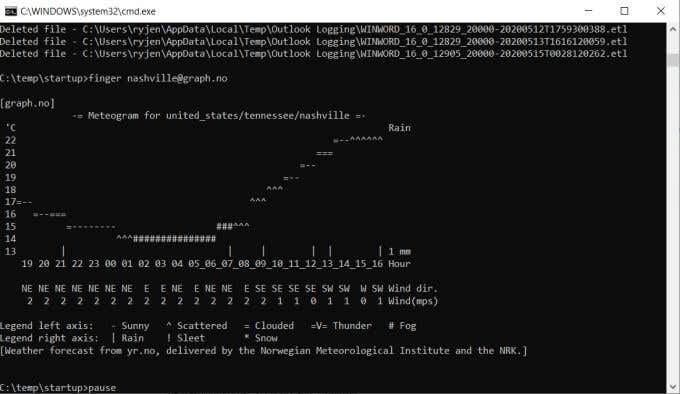
You’ve just created your first working BAT file that automates three useful tasks in a row!
However, you’re not done. You need to tailor some of these commands for your own situation. Let’s take a look at what each of these commands does and how you can tweak them to suit your needs.
Step 2: Customize Your BAT File
Now that you know how to make a BAT file with multiple commands, you’ll need to customize each of those commands for your needs.
The following is a more detailed explanation of each of those commands and how you can customize them.
Start Command
The start command will launch any application you specify. If you use a URL link like this command, it’ll use your default browser to launch that web page. The following command will launch Google News in your default browser.
start https://news.google.com
You can change the URL to have the command open any web page you like.
DEL Command
The DEL command is a very simple one that deletes one or more files in a given directory. There are a variety of parameters you can use to tell the command how to behave.
DEL /F /S /Q %TEMP%
There are a variety of parameters you can use to tell the command how to behave.
- /F – Includes the deletion of read-only files
- /S – Removes files in subdirectories as well as the current directory
- /Q – Requires “quiet” mode which doesn’t require any delete confirmation
In this example, %TEMP% is used to specify the directory. This is the system environment variable for the Windows Temporary Files directory.
If you want, you can specify any other directory. Or, you can list multiple DEL commands and delete files from multiple directories.
Finger Command
The Finger command uses your computer’s internet connection to reach out to any remote computer that’s running the finger service.
These aren’t easy to find, but there is one particularly special service running at graph.no that lets you look up a 24 hour weather forecast using a simple “finger” command.
finger nashville@graph.no
With this command, you just need to place the name of the largest nearby city before the @graph.no part of the web address.
The command returns a graph of temperature and sunshine level symbols for the next 24 hours.
Pause Command
The Pause command will pause execution of your BAT file so that you can see any information that was returned by the various commands. This is especially useful after using the Finger command, so you can view the graph.
If you’re using other commands and don’t need to see any returned information, you can remove the Pause command from the end of the script.
In fact, if you don’t need to see anything from the script at all, you can add @ECHO OFF as the first line of the BAT file and you won’t see anything returned from the commands at all.
Step 3: Schedule Your Batch Job
Once you make a BAT file, it doesn’t do much good unless you manually double-click and run it whenever you want to execute the automated commands.
It would be much easier to let the batch job run automatically every day. You can do this by launching the BAT file as a Windows scheduled task.
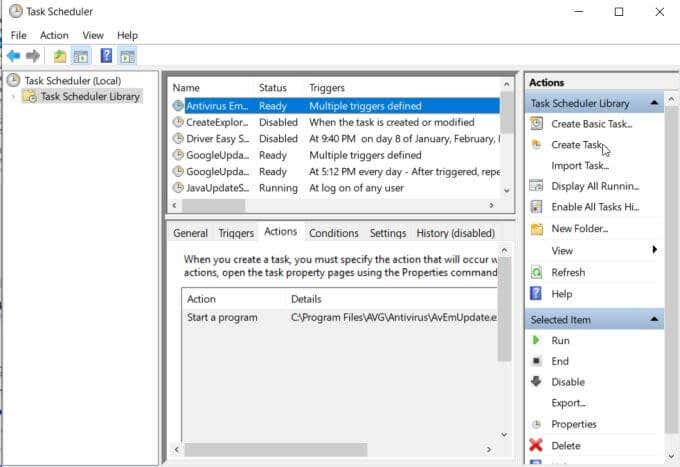
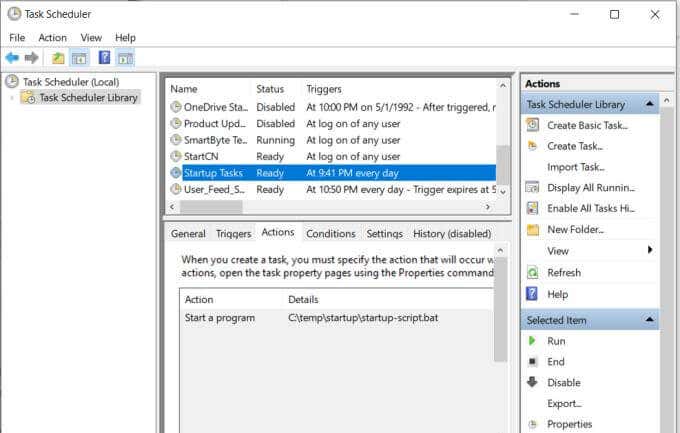
To do this, select the Start menu, type Scheduler, and select Task Scheduler.
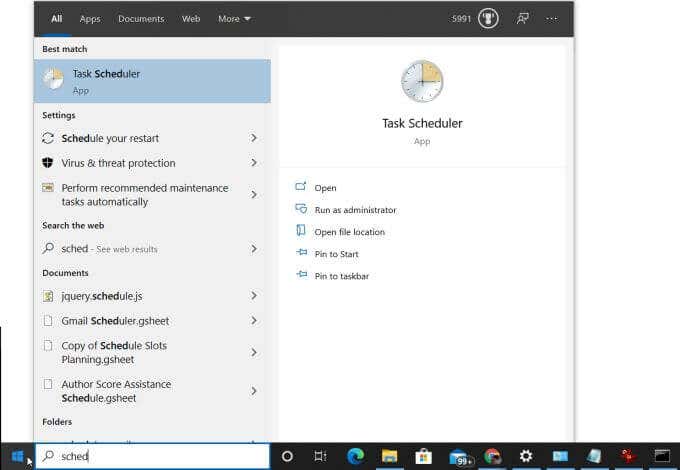
This will open the Task Scheduler. Select Task Scheduler Library from the left pane to see all scheduled tasks on your system.
You can add a new scheduled task to launch your new BAT file. To do this:
- Select Create Task from the Actions panel on the right.
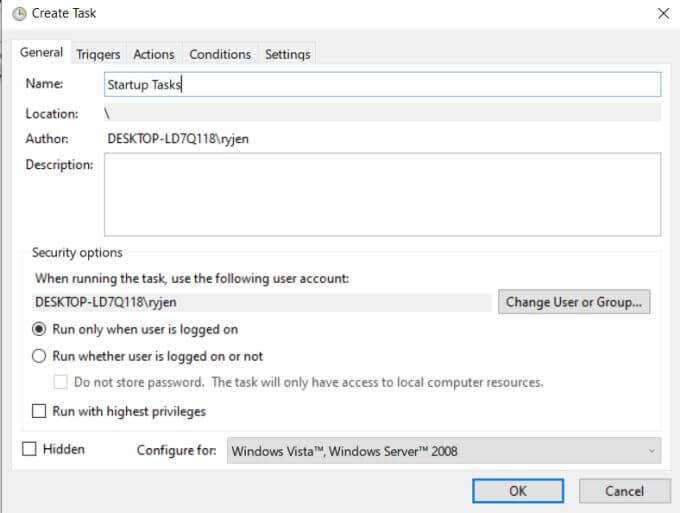
- In the Create Task window, on the General tab, give the task a name in the Name field. Leave all other default settings.
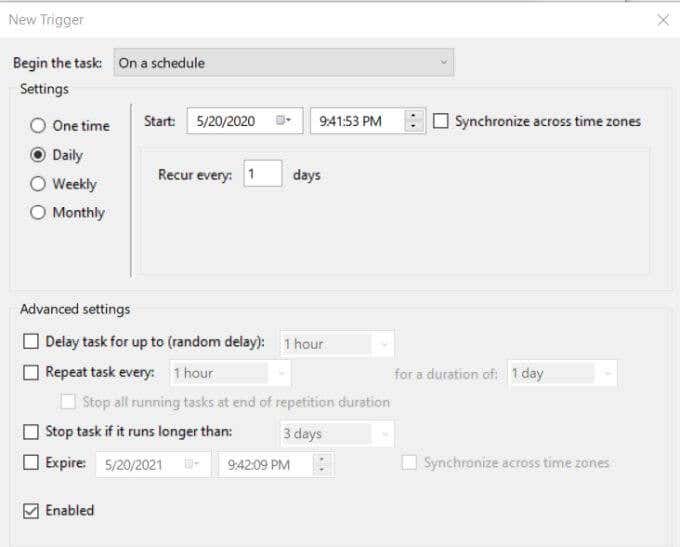
- Select the Triggers tab. Select the New button. In the New Trigger window, select Daily and leave all other default settings. Select OK and select OK on the Create Task window.
- Select the Actions tab, then select New. In the New Action window, select Browse and browse to where you saved your BAT file. Select OK to finish. Select OK on the Create Task window.
- Now you should see your scheduled BAT file in the Task Scheduler Library.
Your new scheduled BAT file will now run every day at the same time.
Customizing Your BAT File
Now that you know how to create and schedule your BAT file, you can start expanding on that file by learning about other BAT file commands you can add to the file.
There are a lot of CMD commands you can add to your BAT file to automate all sorts of things on your computer. Start experimenting and see what sorts of interesting things you can create out of your own batch files.
Subscribe on YouTube!
Did you enjoy this tip? If so, check out our YouTube channel from our sister site Online Tech Tips. We cover Windows, Mac, software and apps, and have a bunch of troubleshooting tips and how-to videos. Click the button below to subscribe!
Subscribe