Don't get steamed, follow these instructions
Steam is the largest online gaming platform, but that doesn’t mean it’s perfect. It’s a computer application like any other. You’re bound to encounter an unexpected problem like a disk write error or Steam not opening and that can significantly reduce your gaming time.

In this article, we’re going to focus on the “can’t connect to the Steam network” error that seems to pop up at the worst times possible. If you can’t connect to Steam you can’t play with friends, you can’t log into your favorite MMORPG, and you’re going to feel extremely frustrated. So here are the most common fixes to help you get back in the game.
Table of Contents
1. Check Your Internet Connection
This might seem obvious, but it’s easy to overlook basic connection errors. If you’ve lost access to the Internet, you’ll get the “can’t connect to Steam network” error as soon as you try to log in to your Steam account. So before you try any of the other fixes in this article, make sure your computer has Internet access. Perhaps you need to reboot your router or maybe you left the network cable unplugged.
2. Run Steam as Administrator
This is a simple solution worth trying before doing anything else. If it doesn’t work, at least you won’t waste more than a few seconds.
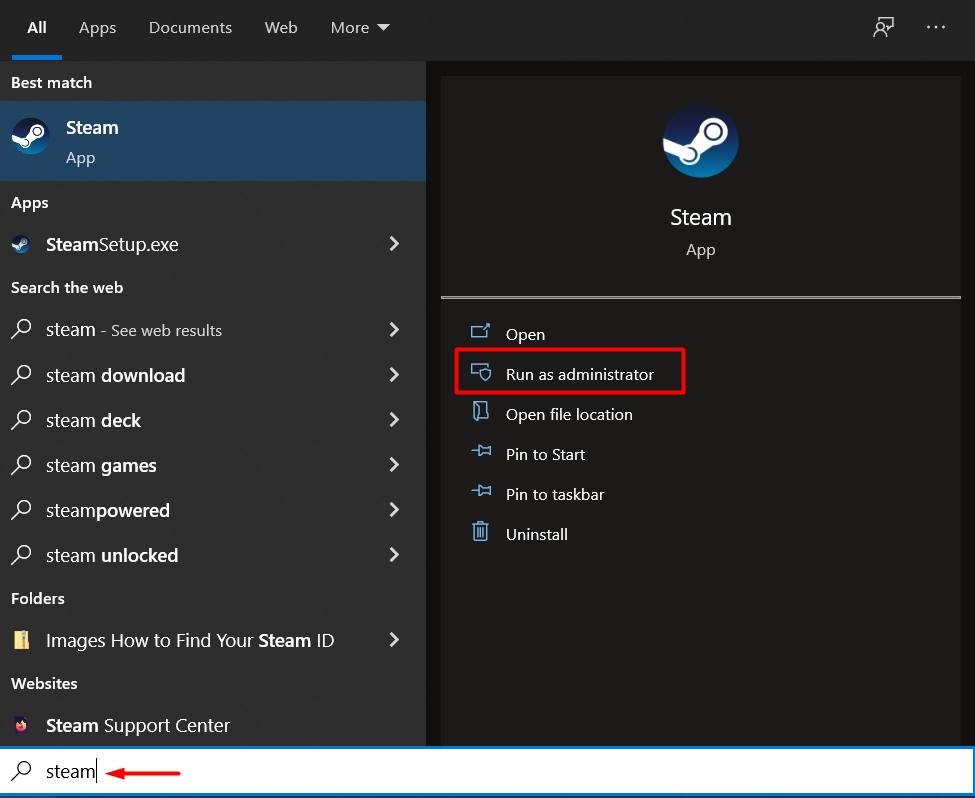
Find the Steam client’s shortcut, right-click it and select the Run as Administrator option. If you don’t have a desktop shortcut, you can locate the client by typing “Steam” in the Windows search field.
3. Restart Your Computer
A lot of strange bugs and network errors can be fixed with a simple PC reboot. A fresh start will clear any frozen applications, processes, and drivers that might be preventing you from connecting to Steam.
4. Use a Different Internet Protocol
By default, Steam uses UDP (User Datagram Protocol). If this protocol becomes unstable, you can’t connect to Steam and the network error pops up. The solution is to switch from UDP to TCP (Transmission Control Protocol). Here’s how you can change Steam’s Internet protocol:
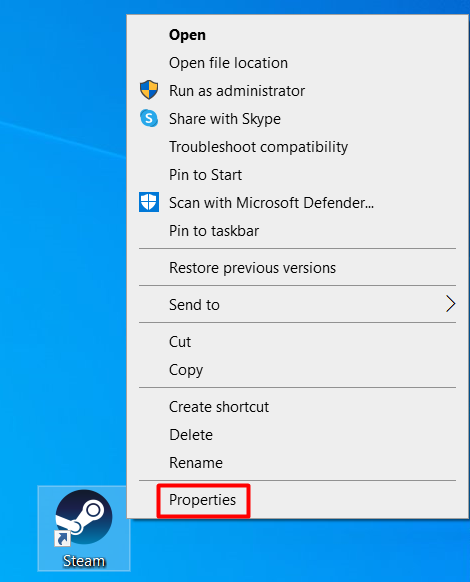
1. Right-click the Steam client and select Properties.
2. Go to the Shortcut tab and edit the Target text by adding -tcp at the end.

3. Select the OK button to confirm the change.
Now you can restart Steam and the “can’t connect to Steam network” error should be fixed.
5. Check the Server Status
Sometimes, there’s nothing wrong with your connection. The Steam servers might be down for various reasons, so before trying a complicated fix make sure you check the official Steam stats page.

You can easily spot an outage just by looking at the Steam users graph.
6. Check the Network Adapters
Are your network adapters working correctly? Launch your favorite browser to see if your PC is connecting to the Internet normally. If everything looks fine, chances are there’s nothing wrong with your network adapters. Nonetheless, you should confirm everything is fine by following these steps:
1. Right-click on the Windows icon and select Device Manager from the list.

2. Go to Network adapters and expand the menu to see the whole list of adapters.

3. Double click on an adapter to automatically open the Properties panel.
4. Check the Device status.

If something is wrong with the network adapter and you don’t see the “This device is working properly” message, you should try to release and renew the IP address. Afterward, restart your computer and launch the Steam client.
7. Update Your Network Drivers
While you’re checking your network adapters in the Device Manager app, you might as well update your network drivers. Drivers need to be up-to-date to ensure your PC is running smoothly. A simple network driver update might be causing that pesky “can’t connect to steam network” error that keeps you from playing your favorite games. Here’s how to update your drivers:
1. Launch the Device Manager once more.
2. Go to the Network adapters section and expand the list of devices.
3. Select the network adapter you want to update, right-click it, and choose Update driver from the menu.

4. The driver update Window will open and ask you how you want to install the driver. Choose the Search for drivers automatically option and follow the instructions.

8. Update Steam
You can fix many Steam issues by updating the Steam client. This includes the “can’t connect to Steam network” error.
In most cases, Steam updates itself automatically as soon as you log in. However, there are times when something interferes with the client and the update is prevented. To manually update Steam, all you need to do is click on the Steam menu button and select Check for Steam Client Updates.

9. Reinstall Steam
If nothing worked so far, it’s time to reinstall Steam. You might be dealing with some missing or corrupted files that are preventing the client from properly connecting.
Take note that reinstalling steam will delete your game folders. This can cause you to lose save files, so make sure you backup your game folders. You can simply copy/paste the game files anywhere you want before reinstalling Steam.
That said, here’s how to reinstall the Steam client:
1. Right-click on the Windows icon and select Apps and Features.

2. Scroll through the list of apps until you find Steam and select it.
3. Select the Uninstall button.

4. Reinstall Steam from the official page by clicking on the Install Steam button. Follow the instructions and you’ll be good to go.

10. Check the Windows Firewall
If absolutely nothing worked so far and you still can’t connect to Steam, the Windows firewall might be blocking one of the ports that Steam uses.
The firewall sometimes fails to tell the difference between good and bad traffic, so it sees Steam as a potential threat and blocks all its traffic. Here’s what you need to do to let Steam pass through:
1. Type “windows security” in the Windows search box and launch the Windows Security app.
2. In the left panel, click on Firewall & network protection and then select the Allow an app through firewall option in the right panel.

3. Scroll through the list of apps until you find Steam and anything else related to the client. Check the boxes next to them to allow them to pass through the firewall.

4. Select the OK button to confirm these changes.
Restart your computer and launch Steam. Which fix worked for you? Let us know in the comments below!
Subscribe on YouTube!
Did you enjoy this tip? If so, check out our YouTube channel from our sister site Online Tech Tips. We cover Windows, Mac, software and apps, and have a bunch of troubleshooting tips and how-to videos. Click the button below to subscribe!
Subscribe