Running a virtual machine on Linux allows you to use other operating systems and software without dual boot or partitioning your hard drive. It provides a convenient and efficient way to test, develop, and explore different desktop environments without impacting your primary system.
With various virtualization software available, such as VirtualBox, you can easily create and manage virtual machines. These tools create a virtual PC for these operating systems, enabling them to function alongside your Linux distribution.
To run a Linux virtual machine, follow the steps below.

Reasons to Choose a Virtual Machine over Dual Booting
You might be wondering whether or not it’s better to simply dual boot Linux and another operating system and switch between them. A virtual machine offers several advantages over dual booting for running multiple operating systems on your Linux machine.
Firstly, VMs allow you to run multiple operating systems simultaneously, eliminating the need for constant rebooting when switching between them. It’s more convenient and saves you time. The only bottleneck is your system resources—you’ll need a good enough PC to be able to handle both systems running at the same time.
Secondly, VMs provide better isolation between the host and guest operating systems, reducing potential risks and conflicts. Your primary OS remains safe, even if the secondary one faces issues.
Lastly, you can easily manage and configure VMs, making experimenting with different systems and modifications simpler. They’re isolated into virtual hard drive files, meaning you can create multiple environments to test from.
Choosing an Operating System to Use as a Virtual Machine in Linux
When running a virtual machine in Linux, you have a wide variety of operating systems to choose from. Here are a few popular choices:
- Windows: Windows is the most popular desktop operating system on the planet. If you’re not ready to switch from Windows to Linux entirely, you can run Windows in a virtual machine to continue to run your favorite apps.
- Ubuntu: This popular Linux distribution is user-friendly and great for beginners. It has a strong community and offers plenty of support.
- Linux Mint: Similar to Ubuntu, Mint is also an excellent choice for beginners to Linux. It’s highly customizable and known for offering a familiar Windows-like environment.
- Fedora: A cutting-edge distro, Fedora is known for incorporating the latest technologies and often serves as a testbed for new developments.
- Debian: Stability and reliability are Debian’s primary focus, making it an ideal choice for users who prioritize long-term support and consistent performance.
- openSUSE: Ideal for both beginners and experts, openSUSE provides a stable, balanced option with excellent community support.
- Pop!_OS: Created by System76, Pop!_OS offers a polished user experience optimized for productivity.
This isn’t an exhaustive list—you can run pretty much any operating system in a virtual machine, as long as there’s support for it. Some, like Windows and other Linux distributions, are easy to run. However, others like ChromeOS or macOS lack official support, making them a bit harder to set up.
How to Enable Virtualization on a PC
Before running a virtual machine in Linux, you need to enable virtualization on your PC. Virtualization allows your computer to run multiple operating systems simultaneously by creating virtual computers within your main system.
To enable virtualization on your PC, follow these steps.
- First, restart your PC. As your computer restarts, press the appropriate key to enter the BIOS or UEFI settings menu. The key to access the settings varies depending on your computer’s brand and model, but it’s usually F1, F2, F10, F12, or the Delete key.
- In the BIOS or UEFI settings, search for the virtualization option. This option might be located under the Advanced, Configuration, or Security sections. It may also be called Intel Virtualization Technology, AMD-V or something similar, depending on your processor’s manufacturer.

- Once you’ve located the virtualization setting, make sure to change its value to Enabled if it’s currently disabled.
- After enabling virtualization, save your changes by selecting the Save and Exit option or pressing the corresponding key to save (usually F10).
Your computer will restart, and virtualization will now be enabled, allowing you to run virtual machines in Linux.
How to Install VirtualBox on a Linux PC
You can run a Linux virtual machine in a few different ways, but the easiest is to use VirtualBox. VirtualBox is a powerful and popular virtual machine platform that allows you to run multiple operating systems simultaneously. It’s also free and open source, although there is a free add-on extension pack that isn’t open source.
To install VirtualBox on a Linux PC, follow these steps.
- If you’re running a Linux distribution that isn’t Ubuntu or Debian-based, download the latest version of Virtualbox from the Virtualbox website and install the file using your distribution’s package manager.
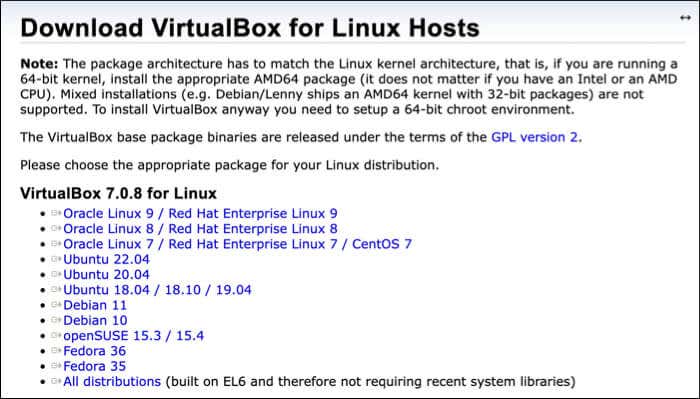
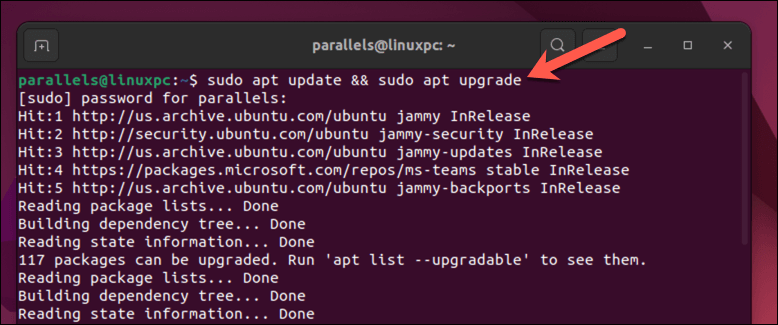
- Otherwise, on Ubuntu or Debian-based distros, open a new terminal window on your Linux PC and run the sudo apt update && sudo apt upgrade commands in your terminal. This will ensure your PC is up-to-date.
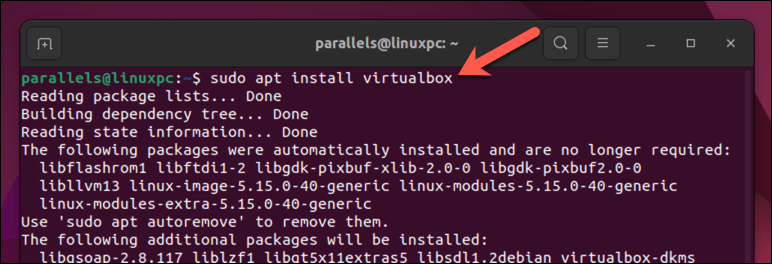
- Next, install VirtualBox by running the sudo apt install virtualbox command in the terminal. This will begin the installation—press Y to confirm.
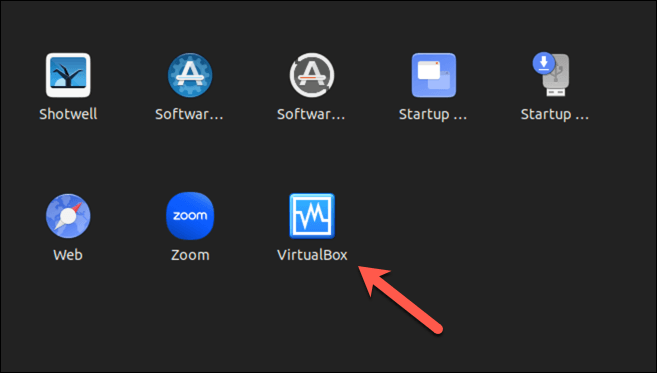
- Once the installation is complete, you can launch VirtualBox from your distro’s apps list.
How to Create a Virtual Machine Using Virtualbox on a Linux PC
With VirtualBox installed, you can create and run virtual machines on your Linux PC.
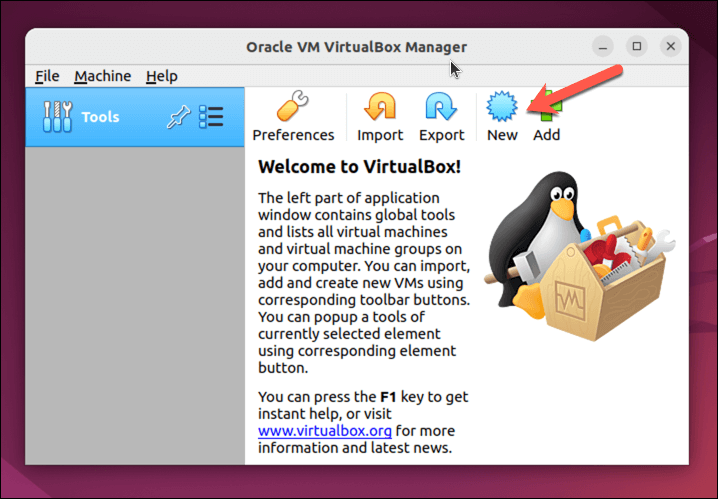
- Launch the VirtualBox application on your device via your distribution’s app menu. You’ll see the main interface where you can manage your virtual machines.
- Click the New button in the top-left corner to start creating a new virtual machine.
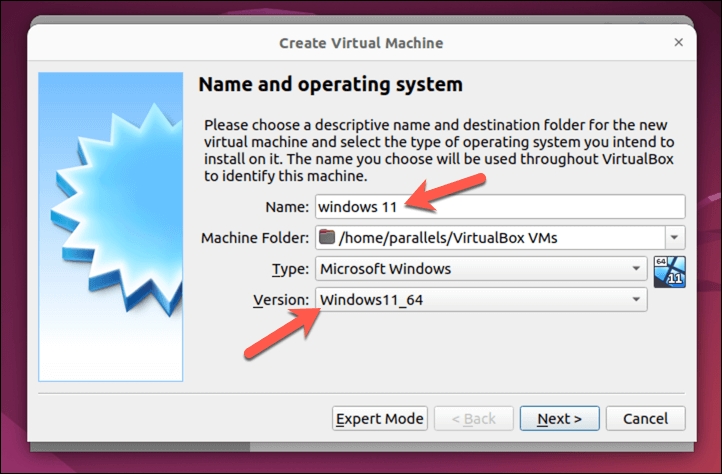
- This will open the Create Virtual Machine wizard. In the wizard, enter a name for your virtual machine and choose the desired operating system type and version from the drop-down menus. For example, if you want to create a Windows 11 virtual machine, choose Microsoft Windows as the operating system type and Windows11_64 as the version.
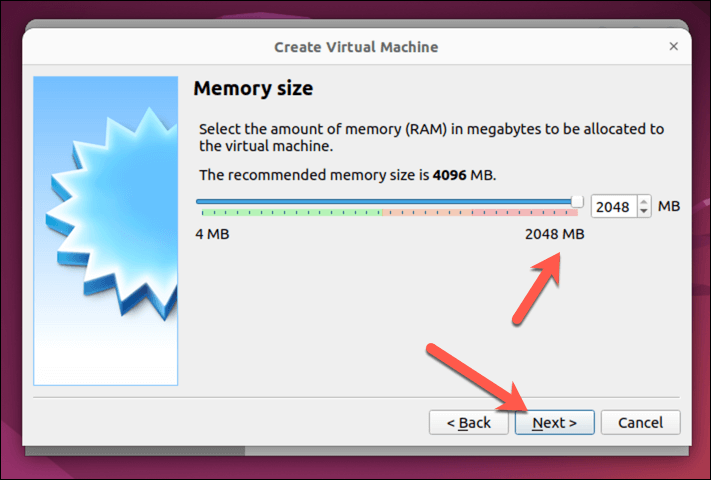
- Next, you’ll need to allocate memory (RAM) for your virtual machine. Keep in mind that the more RAM you allocate, the better your virtual machine will perform. However, don’t allocate more RAM than your host system can handle. You can always change this later, if needed. Press Next to proceed.
- After that, you will be prompted to create a virtual hard drive for your virtual machine. You can create a new virtual hard drive or use an existing one (in the VDI, VHD, or VMDK format). To create a new virtual hard drive, choose Create a virtual hard disk now and click Create. To use an existing virtual hard drive, choose Use an existing virtual hard disk file instead and click on the folder icon to locate and select the file.
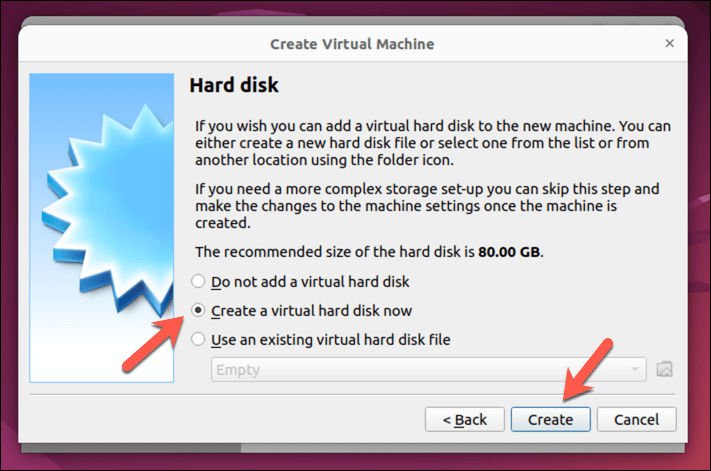
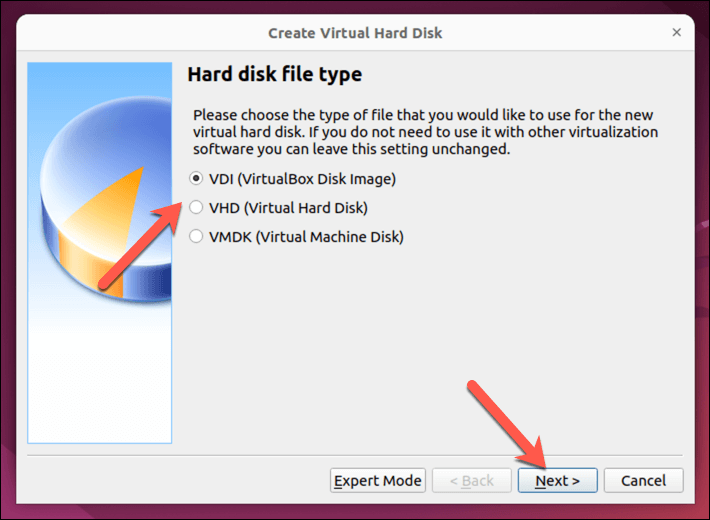
- Select the type of file (VDI, VHD, or VMDK) you want to use for the virtual hard drive, and then specify its size and location. Make sure to allocate enough space for your operating system to install. For instance, Windows 11 requires at least 64GB of space, but Linux distros can deal with much less. Press Next to continue.
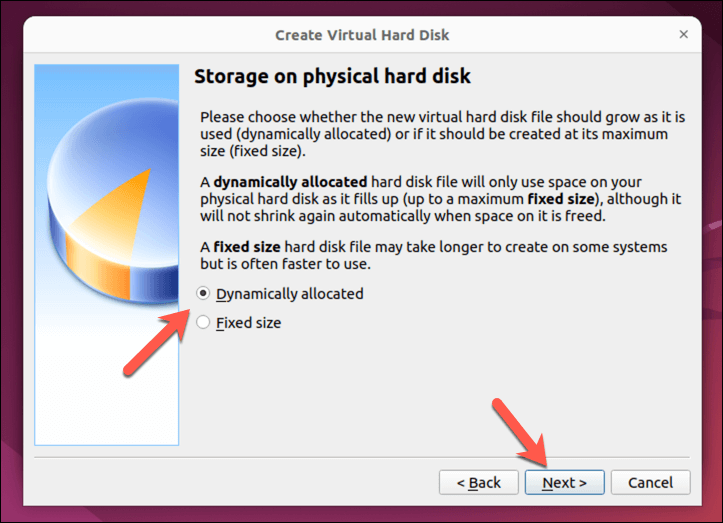
- You can choose to make the hard drive file a fixed size or use dynamic allocation, meaning that the file will grow as the data on your virtual machine grows. Select your preferred option and press Next.
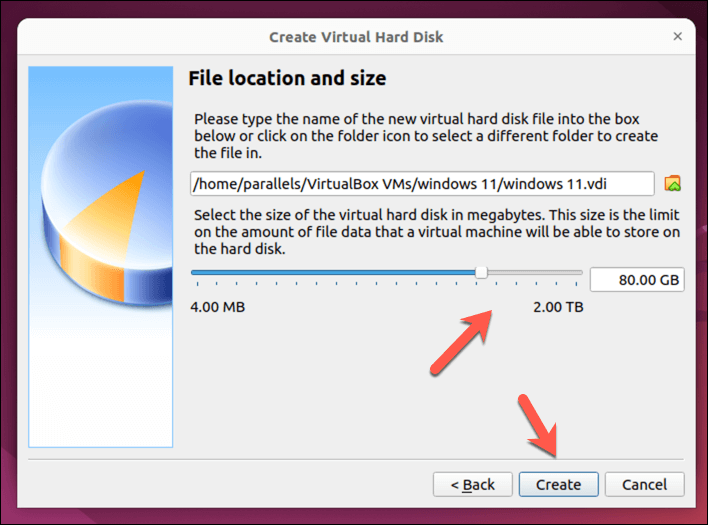
- Next, choose the location for the hard drive file and the size of the drive and press Create to proceed. Make sure to make the file big enough to handle the operating system you plan to install.
- At this point, your virtual machine will now be listed in the main VirtualBox interface, but you’ll also need to make sure that the installation media for your operating system is accessible to the virtual machine in the Controller: IDE or Controller: SATA settings as a virtual disk drive. For instance, if you’ve downloaded a Linux distro, you’ll need to ensure the image file is selected so that the installation can begin when the VM first runs.
- To do this, select your virtual machine and press Settings.
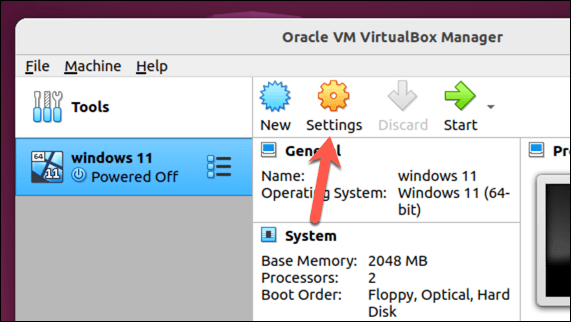
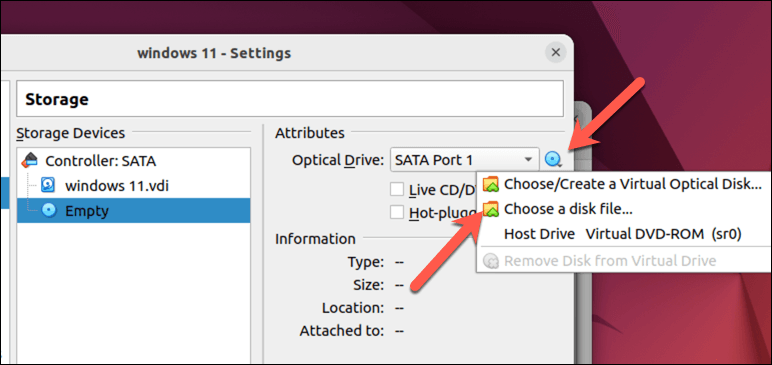
- In the Settings window, select Storage and select the Empty virtual DVD drive.
- Press the DVD icon in the top-right, then select Choose a disk file to select a virtual image containing your installation media. If you’re installing Windows, for instance, you can download this from the Microsoft website.
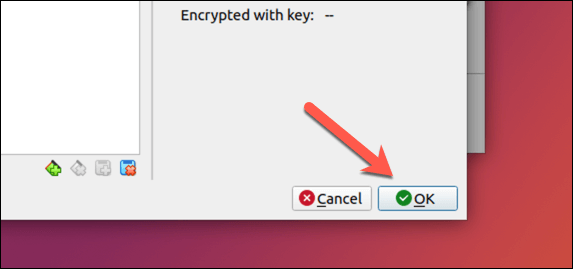
- Press OK to save your settings.
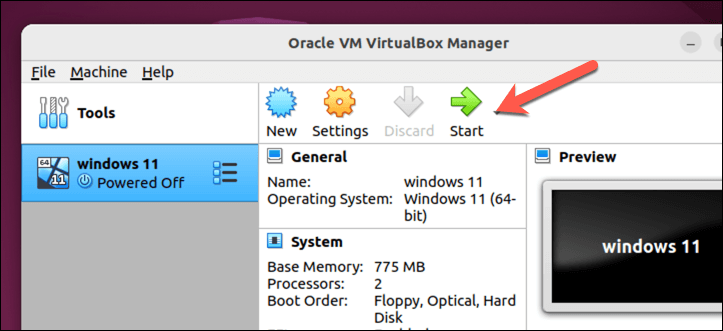
- To start your virtual machine, select it in the list and click the Start button at the top of the window. The virtual machine will boot up and display the chosen operating system.
Once you’ve first booted up your PC, the installation process will begin for your operating system. You’ll need to follow the on-screen instructions to complete the process—this may take some time to complete.
Once you’ve completed these steps, you should have a fully functional virtual machine running in VirtualBox on your Linux PC.
Running a Linux Virtual Machine
Thanks to software like VirtualBox, running a virtual machine on your Linux PC is easy. If you can’t quite give up Windows, or you want to try out another Linux distribution like Linux Mint or Ubuntu, this is a good (and faster) alternative to dual booting on your PC.
If VirtualBox isn’t for you, you may find better luck trying an alternative like VMWare instead. You can always stick with VirtualBox and try it in reverse to run Linux on a Windows PC instead.