
A cryptic error difficult to decipher
Do you keep running into an 0x80131500 error while attempting to open the Microsoft Store in Windows 11 or 10? We’ll show you all the possible ways to fix that.
The Microsoft Store’s 0x80131500 error code can show up for several reasons. For example, you might be dealing with a buggy Microsoft Store installation, conflicting network settings, or user profile corruption.
Table of Contents
Work through the fixes below to fix the Microsoft Store error code 0x80131500 in Windows 11 and 10.

1. Enable the Background Intelligent Transfer Service
Native Windows apps use a background service called Background Intelligent Transfer Service (or BITS) to handle uploads and downloads. If BITS crashes or fails to run automatically at startup, it may trigger the Windows Store error 0x80131500. Check its properties and perform the following actions if needed.
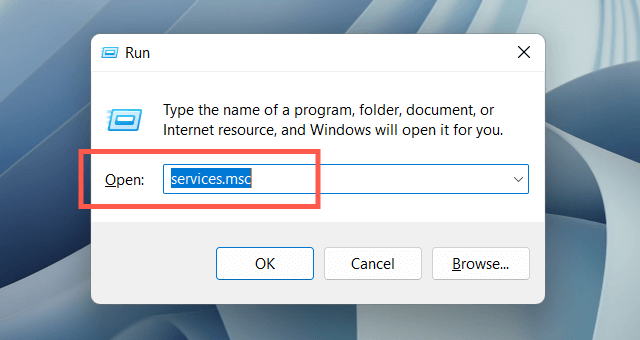
1. Press Windows Key + R to open the Run box. Then, type services.msc and press Enter.
2. Locate and double-click the Background Intelligent Transfer Service.

3. Set Startup type to Automatic and Service status to Running (select Start). Save your changes and reboot Windows.

2. Temporarily Disable Your Antivirus Program
If you use a third-party antivirus utility, briefly disable it and check if that makes the Microsoft Store error 0x80131500 disappear. If that helps, add the WinStore.App.exe file under the following location into the program’s exceptions list:
Local Disk (C:) > Program Files > WindowsApps > Microsoft.WindowsStore_[Windows Build Number]_8wekyb3d8bbwe
3. Run the Windows Store Apps Troubleshooter
Running the Windows Store Apps troubleshooter in Windows 11 or 10 helps resolve underlying issues preventing the Microsoft Store from working. To get to it:
1. Open the Start menu and select Settings.

2. Select the System category.

3. Select Troubleshoot.

4. Select Other troubleshooters (or Additional troubleshooters if you use Windows 10).

5. Locate the Windows Store Apps troubleshooter and select Run/Run the troubleshooter.

4. Repair the Microsoft Store App
The following fix involves repairing the Microsoft Store. Don’t worry—it’s quick and straightforward.
1. Right-click the Start button and select Apps and Features.

2. Select Microsoft Store > Advanced options.

3. Select Terminate > Repair.

5. Reset the Windows Store
If repairing the app doesn’t help, try resetting the Windows Store. That clears the Store cache and reverts the app to factory defaults.
To do that, repeat the steps above but select Terminate > Reset in step 3. Alternatively, type WSReset.exe into the Start menu and press Enter.
6. Change Your Network’s DNS Servers
Change the DNS (Domain Name System) servers for your Wi-Fi or Ethernet connection to Google DNS. That improves the Microsoft Store’s chances of locating and communicating with the correct servers. You might want to clear the DNS cache in Windows before you begin.
1. Open the Settings app and select the Network & Internet category.

2. Select Properties next to your wireless or Ethernet network connection.

3. Select Edit next to DNS server assignment.

4. Select Edit network DNS settings to manual and turn on the switch next to IPv4 (Internet Protocol version 4). Then, fill the empty fields as follows and save your changes:
Preferred DNS Server: 8.8.8.8
Alternate DNS Server: 8.8.4.4

7. Disable Your Computer’s Proxy Settings
If the Microsoft Store’s 0x80131500 error persists, stop your computer from looking for or connecting to any proxy servers and try opening the app again.
1. Open the Settings app and select Network & internet > Proxy.

2. Disable the switch next to Automatically detect settings and check again. Also, set the Use setup script and Use a proxy server option to Off if active.

8. Update Windows to the Latest Version
System-related bugs can play a factor behind the Microsoft Store’s 0x80131500 error. The best way to rule that out is to update Windows to its latest version.
1. Open the Settings app and select Windows Update.

2. Select Check for updates and install all pending operating system updates.

9. Configure Your Internet Options
Microsoft’s forum chatter indicates setting your network to use only the TLS 1.2 and TLS 1.3 cryptographic protocols as another likely fix for the Microsoft Store 0x80131500 error. Here’s how to do that:
1. Type Internet Options into the Start menu or Windows Search and press Enter.

2. Switch to the Advanced tab and clear the Use SSL 3.0, Use TLS 1.0, and Use TLS 1.1 boxes. Then, enable Use TLS 1.2 and Use TLS 1.3, save your changes, and reboot your computer.

10. Check the Time, Date, and Region
An incorrect time, date, or region on your computer can create communication rifts between apps and servers. Double-check the relevant settings and make adjustments if needed.
1. Open the Settings app and select Time & language.

2. Select Date & time.

3. Manually set the correct time and time zone or sync the clock with an internet time server.

4. Head back to the previous screen. Then, select Language & region to reveal Windows’ region settings.

5. Open the drop-down menu next to Country or region and pick the correct region.

Note: If you use a virtual private network (VPN), disable it to ensure that the Microsoft Store connects to servers from the correct region.
11. Re-register the Microsoft Store With Windows
Use an elevated Windows PowerShell console to re-register the Microsoft Store with Windows.
1. Right-click the Start button and select Windows Terminal (Admin).

2. Select Yes on the User Account Control pop-up.

2. Execute the following command:
Get-AppXPackage *WindowsStore* -AllUsers | Foreach {Add-AppxPackage -DisableDevelopmentMode -Register “$($_.InstallLocation)\AppXManifest.xml”}

12. Uninstall and Reinstall the Microsoft Store
If re-registering the Microsoft Store doesn’t fix the 0x80131500 error, try reinstalling it. Again, open an elevated Windows PowerShell console. Then, run the following commands one after the other:
- Get-AppxPackage -allusers *WindowsStore* | Remove-AppxPackage
- Get-AppXPackage -AllUsers | Foreach {Add-AppxPackage -DisableDevelopmentMode -Register “$($_.InstallLocation)\AppXManifest.xml“}
13. Perform an SFC and DISM Scan
Run the System File Checker and DISM command-line tools to fix possible file corruption in Windows.
1. Open an elevated Windows PowerShell console. Or, launch the Command Prompt with administrative privileges (open the Start menu, type cmd, and press Enter). Then, run the System File Checker:
sfc /scannow

2. Follow up with the DISM (Deployment Image Servicing and Management) tool:
DISM /Online /Cleanup-Image /RestoreHealth

14. Reset the Network Settings in Windows
Continue by resetting your computer’s TCP/IP stack and network settings. You must manually reconnect to any Wi-Fi networks after that.
1. Open the Settings app and select Network & internet > Advanced network settings.

2. Select Network reset.
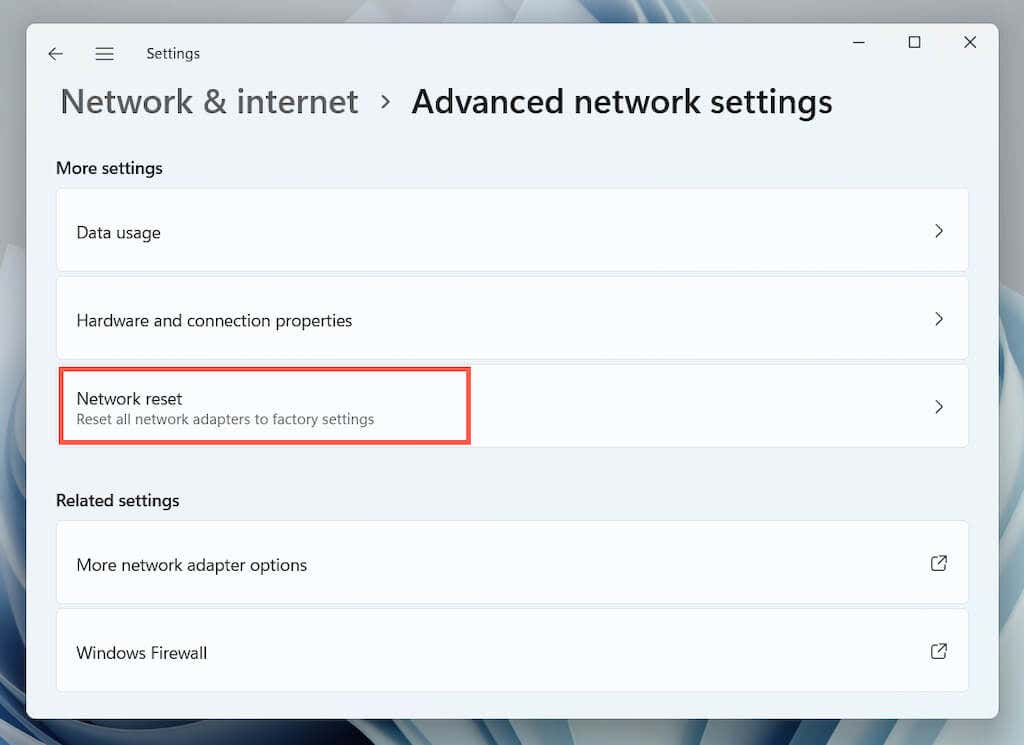
3. Select Reset now.

15. Create a New Windows User Profile
If you made it all the way here, the Microsoft Store error 0x80131500 could be due to a corrupt Windows user profile. Confirm by creating a new user account.
1. Open the Settings app and select Accounts.

2. Select Family & other users.

3. Select Add account under Other users.

4. Select I don’t have this person’s sign-in information > Add a user without a Microsoft account.

5. Name the new Windows profile and select Next.

6. Open the Start menu and switch to the new user account.

If the Microsoft Store opens, migrate your data to the new account and delete your old profile.
Microsoft Store Error 0x80131500 Fixed
The Microsoft Store error 0x80131500’s cryptic nature makes it difficult to pinpoint the exact reason. If none of the fixes above help, the next logical step is to reset Windows to factory defaults. Make sure to back up your personal data before you do that.
Subscribe on YouTube!
Did you enjoy this tip? If so, check out our YouTube channel from our sister site Online Tech Tips. We cover Windows, Mac, software and apps, and have a bunch of troubleshooting tips and how-to videos. Click the button below to subscribe!
Subscribe


