Plus special tips to enhance the experience
Skype remains one of the best platforms for instant messaging, voice calls, and video conferencing. You can use Skype on your smartphone, tablet, laptop, smart speaker, console, etc. Skype also works perfectly on Chromebooks.
If you bought a new Chromebook, converted your old laptop into a Chromebook, or you’re still getting familiar with Chrome OS, we’ll show you how to install and use Skype for Chromebook.
Table of Contents

Download and Install Skype on Chromebook
There are several ways to access Skype on Chromebook. You can download the app from the Play Store, install the Linux version, or use the Skype web client. We’ll show you how to access Skype using all three methods.
Install Skype from the Google Play Store
If you’re reading this article on your Chromebook, visit the Skype download page on the Play Store and click Install. If you’re reading this post on another device, follow the steps below to download Skype for Chrome OS.
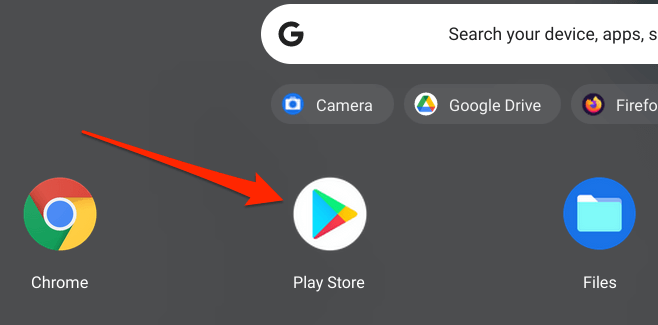
1. Tap the launcher icon at the bottom-left corner of the screen to open the Chromebook desktop.

2. Tap the Apps viewer icon.
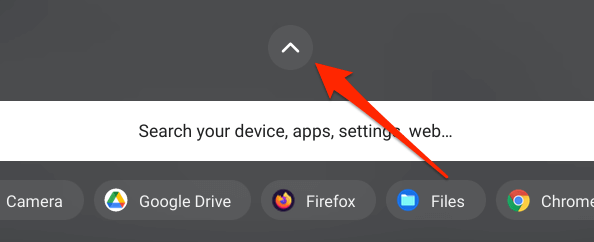
3. Select Play Store.
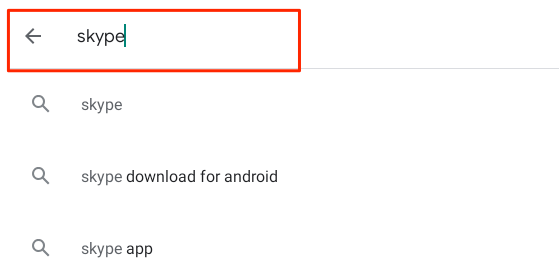
4. Type skype in the search bar and press Enter.
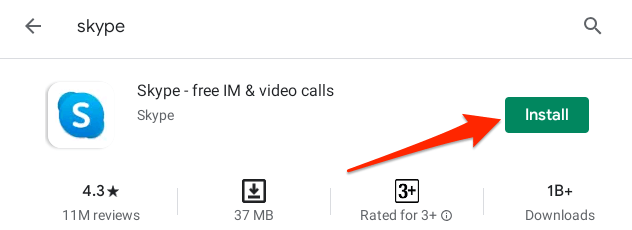
5. Click the Install button to download Skype to your Chromebook.
Install Skype As a Linux App
Not too many people know that Chrome OS supports apps designed for Ubuntu Linux. This means you can install and run Linux apps on your Chromebook without any issues. Follow the steps below to install the Linux version of Skype on your Chromebook.
Note: Running Linux apps on Chromebook requires the Chrome OS 69 or later. Go to Settings > About Chrome OS to check your Chrome OS version or update your Chromebook’s operating system. Likewise, you also need to first enable the Linux environment on your device.
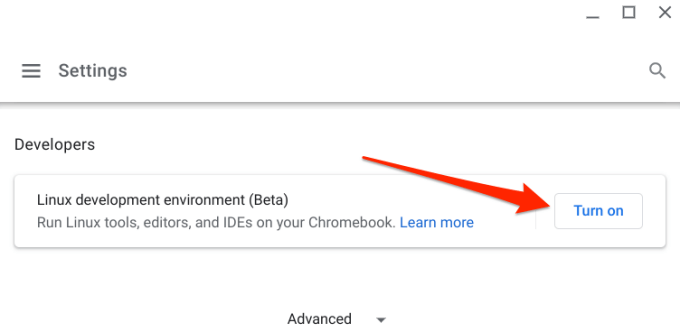
1. Go to Settings > Developers > Linux development environment (Beta) and select the Turn on button.
2. Click Next to proceed.
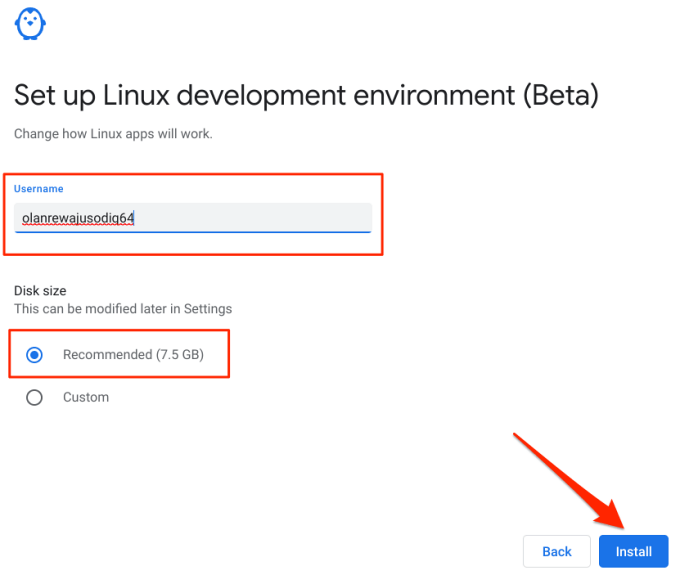
3. Enter a preferred name in the Username dialog box or use the system-generated name. In addition, use the Recommended disk size and select Install to proceed.
4. Chrome OS will download the files required to set up the Linux development environment. This will take a couple of minutes, depending on your Chromebook’s hardware configuration and internet speed.
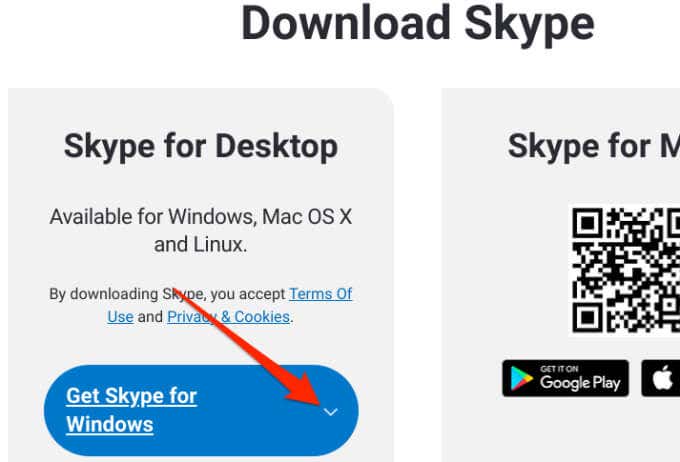
5. Upon successful installation of the Linux virtual machine, go to Skype’s official download page and tap the Get Skype for Windows drop-down button.
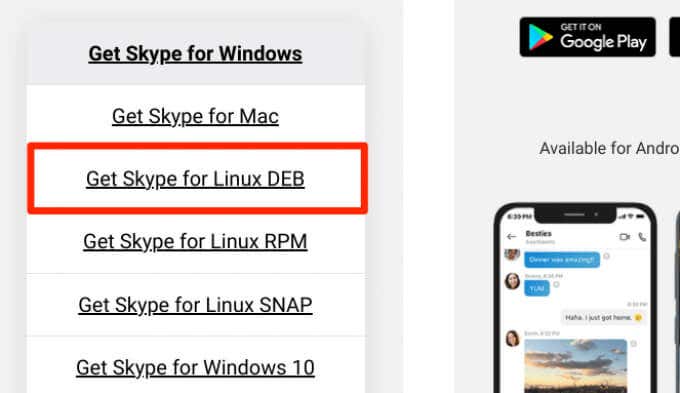
6. Select Get Skype for Linux DEB from the drop-down option.
7. Select the destination folder and select Save.
8. Launch the Files app, right-click the Skype setup file and select Install with Linux.
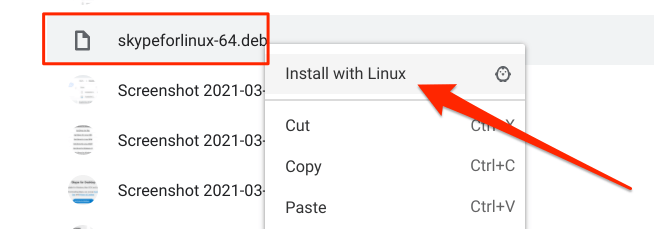
9. Select Install to proceed.
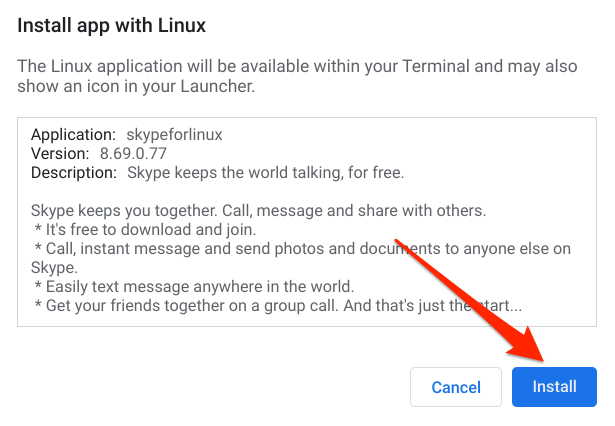
When the installation is complete, you’ll find the Skype app in the Linux apps folder when you open the apps viewer.
Use Skype for Web
You’re better off accessing Skype from a web browser if you don’t use the conferencing service frequently. Or if your Chromebook is running low on storage space; the Skype app creates hidden cache files that consume storage unnecessarily.
To use Skype for Web on your Chromebook, you’ll need to have the latest versions of either Chrome or Microsoft Edge. Using unsupported browsers (e.g. Firefox or Opera) to access Skype for Web will display a “Browser not supported” error message.

Visit the Skype for Web page, sign in to your Microsoft account, and you’re all set. It’s worth mentioning that Skype’s web and app clients have similar interfaces, features, and functionalities.
Uninstall Skype from Chromebook
There are many reasons why you may need to uninstall Skype from your Chromebook. It could be to free up storage space, or because you’re switching to an alternative call conferencing app. To delete Skype from your device, open the Chrome Desktop, right-click on Skype, and select Uninstall.
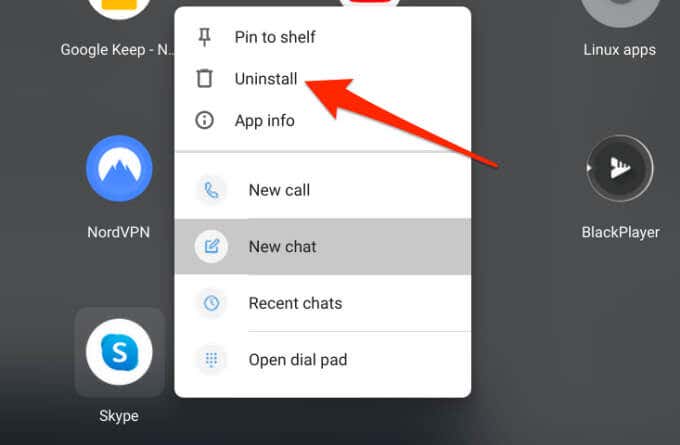
If your Chromebook is in tablet mode, long-press the Skype icon and select Uninstall. You can also uninstall Skype from the Chrome OS settings menu: Go to Settings > Apps > Manage your apps > Skype and select the Uninstall button.

Chromebook Tips for Skype
Here are some tips that’ll help you use Skype smoothly on your Chromebook.
Pin Skype to the Shelf
If you use Skype regularly, say everyday, you should pin it to the Shelf—the small area at the bottom of the screen. The Shelf is the Chrome OS’ equivalent of the Windows Taskbar and macOS Dock.
When using Skype, right-click or long-press the app icon on the Shelf and select Pin.

Another way to do this is to right-click or long-press Skype on the app viewer and select Pin to shelf.

Now you can quickly launch Skype anytime without having to open the Chrome OS apps viewer.
Launch Skype Using Voice Command
Using Google Assistant, you can open Skype on your Chromebook by saying “Hey Google. Open Skype” or “OK Google. Launch Skype.”

Check out this comprehensive guide on how to set up Google Assistant on Chromebook.
Start a New Meeting
To create a new Skype meeting, launch the app and tap the Meet Now icon next to the search bar.
[17-skype-video-call-chromebook.png]
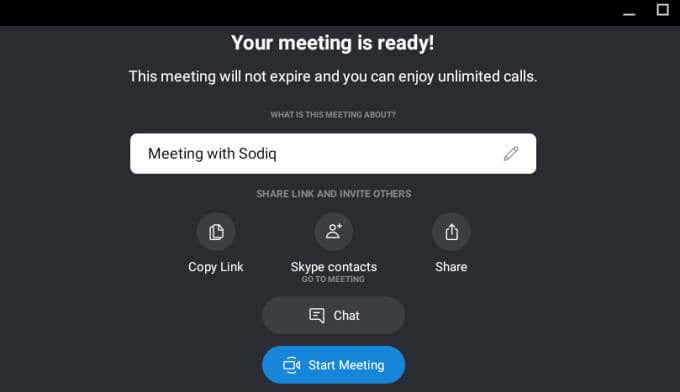
Skype will create and display your meeting details on the next page. You can copy the meeting link, add your Skype contacts, or share the meeting link with others. Select the Start Meeting button to commence the meeting or select Chat to return to the messaging window.
To start a new meeting from your browser, visit the Skype for Web meeting portal and select Create a free video call.

Skype the Chromebook Way
If you choose to install Skype on your Chromebook, we recommend downloading the Android version from the Play Store. It’s smaller (size-wise) and easier to update. However, if you have multiple Skype accounts, you can install both the Android and Linux versions and run different accounts on them.
Subscribe on YouTube!
Did you enjoy this tip? If so, check out our YouTube channel from our sister site Online Tech Tips. We cover Windows, Mac, software and apps, and have a bunch of troubleshooting tips and how-to videos. Click the button below to subscribe!
Subscribe