You'll be up and running in no time
A faulty Wi-Fi connection doesn’t have to ruin your day. There are plenty of ways you can restore a lost internet connection. Follow these network troubleshooting tips and you’ll be up and running in no time.
1. Check Your Settings
First, check your Wi-Fi settings. Go to Settings > Network & Internet > Wi-Fi. Switch Wi-Fi to the On position.
Table of Contents

Phones and tablets also have settings that turn Wi-Fi on and off. Make sure that it is turned on so you can connect to the network.
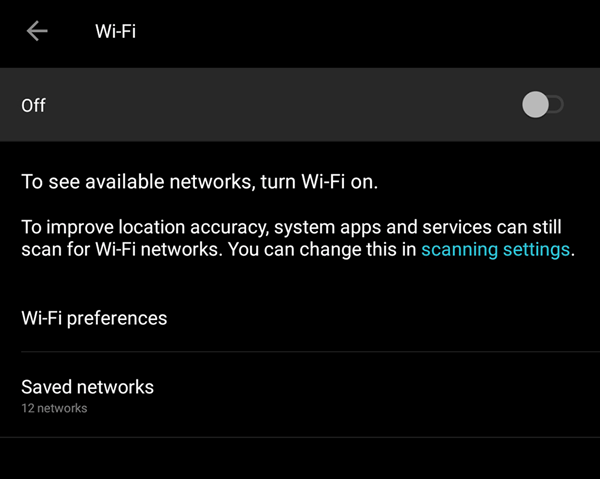
You also want to check if Airplane Mode is turned on.
2. Check Your Access Points
Check your WAN (wide area network) and LAN (local area network) connections. In layman’s terms, these are the Ethernet cables that go to and from your router.
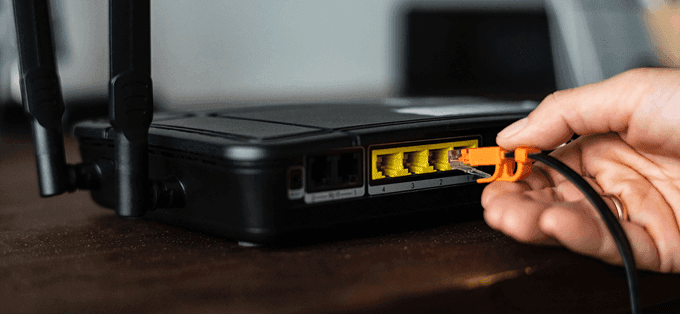
If you suspect that the cables are the culprit, try swapping them out with new ones.
3. Go Around Obstacles
Walls, furniture, and other obstructions can be the reason why you’re unable to go online. Moving closer to the router can re-establish the connection. If moving closer to the router does not solve the issue, then at least we can remove it from the list of suspects.
4. Restart the Router
Sometimes restarting the router can help fix connectivity issues. This is even truer in cases where the router has not been turned off in a while. A quick restart can jolt the router back into working like it used to.
If that doesn’t work, you might also consider resetting the router. But only do so if you’re okay with it being restored to its factory settings. You will have to reconfigure everything including the SSID and password.
5. Check the Wi-Fi Name and Password
Check the network name (otherwise known as SSID) and password of the network connection. If you’re used to connecting automatically when in range of a router but are no longer able to, changes may have been made to the network while you’re away.
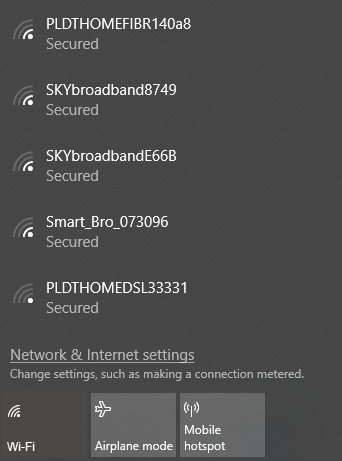
It could be as simple as administrators updating the password or the SSID could have been changed to a different one.
6. Check DHCP Settings
Routers are usually set up as DHCP servers. This setting lets computers join a network automatically. With DHCP turned on, users will no longer have to mess with IP Address and DNS Server settings manually.
To edit your DHCP settings, go to Windows Settings > Network & Internet > Wi-Fi. Under Wi-Fi, click Manage Known Networks. Select a network and click Properties.

Under IP Settings, click Edit. From the drop-down menu, select Automatic (DHCP).
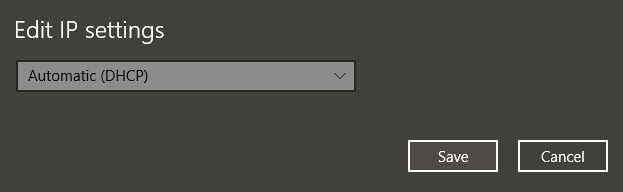
Note: Selecting Manual will let you set your DNS Server Address and IP Address settings manually.
7. Update Windows
Your network problems could be caused by your system. If that is the case, Windows could have possibly released a fix. Try updating your Windows machine to the latest release.
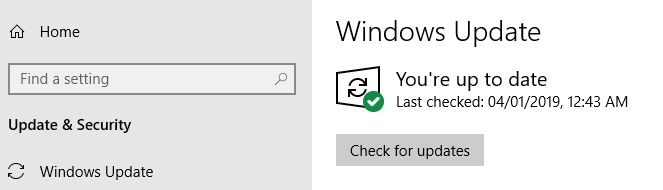
Go to Windows Settings > Update & Security > Windows Update. Click Check for Updates. If there are updates available, Windows will download and install them.
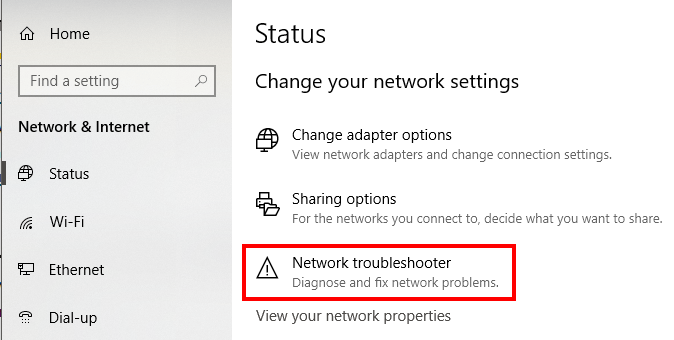
8. Open Windows Network Diagnostics
Windows has a tool called Windows Network Diagnostics that lets users troubleshoot connection issues.
Go to Windows Settings > Network & Internet > Status. Under Change Your Network Settings, click Network Troubleshooter.
Windows Network Diagnostics will run a couple of tests to see what’s possibly causing your Wi-Fi issues.
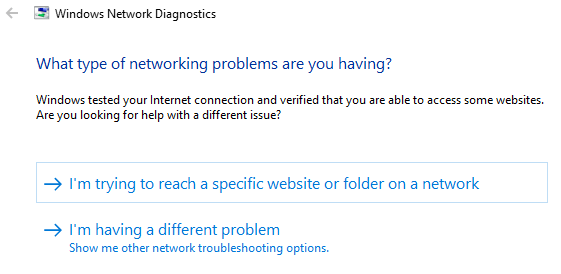
Windows will let you know if it does not find any issue. Otherwise, you will be given a list of possible actions to take to resolve the problem.
This tool, or a version of it, should be available in Windows 7 to Windows 10.
Subscribe on YouTube!
Did you enjoy this tip? If so, check out our YouTube channel from our sister site Online Tech Tips. We cover Windows, Mac, software and apps, and have a bunch of troubleshooting tips and how-to videos. Click the button below to subscribe!
Subscribe